After seeing a number of IVA posts on RHOCAR regarding the time taken to get an IVA, I have sent my IVA application forms off today. Hopefully they are all correct, fairly straight forward but always take your time with them.
I have seen waiting times of up to 5 weeks, so should have plenty of time to get the car finished and IVA ready. Will probably give the process 2 weeks before following it up to see how soon I can realistically get a test and push the car through just that bit quicker.....otherwise the sun will well and truly have gone for this year :(
The money went quick! I had a phone call in only a couple working days to take my payment! Efficiency at it's finest! If only the rest of the process goes so well.
Friday, 30 August 2013

Sunday, 18 August 2013
Engine Running Happily!
During the build, you will set yourself some major milestones. The popular few are:
What I thought was a fuelling issue, followed by a fuel pump issue, turned out to be wrong. I have found that the fuel pumps operate via the circuit opening relay. Originally I thought this was knackered which at £80 for a new one was a bit steep for a potential replacement considering they're meant to last forever, so I decided on finding a way to bypass this. Turns out this can be done through the diagnostics plug by jumping the F/P and GND ports with a wire. Did this, fuel pumps worked. Fantastic! However probably not the best idea for a permanent replacement...unfortunately this didn't solve the problem. Update from 04/09/13 - Turns out my fuel pump and gauge are actually working as they should now...so the problem went away from that point of view....might be a little bit dodgy, sticking relay maybe, on its way out? I'll just put this knowledge safely away for the time it stops working.
I tried to fiddle with the Idle Control Valve too, thinking it was somehow too low....still no success.
Staring at the intake manifold and engine I noticed a pipe at the back which obviously used to be connected to something, however I have no idea what. I could hold an unsteady idle (1500-2000) turning the throttle pulley, trying to figure out if I could do that somehow. Then something happened...I don't know why or how it did but it just did, I must have been possessed by the kit car God, looking over my build....I put my finger over the pipe, blocking it off....
I let go of the throttle and sat there as my finger slowly got sucked into the pipe...smoooooth idle! I let go and it died. Simple problem really. The intake wasn't getting a proper vacuum, hence the chaotic revs and cutting out.
I found a bit of rubber off-cut from the IVA covers for the steering arms, held on tight with a jubilee clip to prevent it being sucked in (shouldn't but better safe than sorry) and voila!
Engine was ticking over by itself!
Well you know what this means! In tribute to Tony Stark after building the Iron Man suit "Sometimes you gotta run before you can walk" I hoped in and had a little test up and down the driveway. It's only about 20-30 metres but it was enough to get the car driving under it's own power!
All the hard work and troubles I've had just melted away to be replaced by my HUUUGE grin! Just from crawling in first gear, I can already tell this is going to be a quick car. I just can't wait to get a chance to properly get it going.

- Donor Stripped Fully
- Kit Collection
- Rolling Chassis
- Engine In
- Engine Working
- Movement
- Completion
What I thought was a fuelling issue, followed by a fuel pump issue, turned out to be wrong. I have found that the fuel pumps operate via the circuit opening relay. Originally I thought this was knackered which at £80 for a new one was a bit steep for a potential replacement considering they're meant to last forever, so I decided on finding a way to bypass this. Turns out this can be done through the diagnostics plug by jumping the F/P and GND ports with a wire. Did this, fuel pumps worked. Fantastic! However probably not the best idea for a permanent replacement...unfortunately this didn't solve the problem. Update from 04/09/13 - Turns out my fuel pump and gauge are actually working as they should now...so the problem went away from that point of view....might be a little bit dodgy, sticking relay maybe, on its way out? I'll just put this knowledge safely away for the time it stops working.
I tried to fiddle with the Idle Control Valve too, thinking it was somehow too low....still no success.
Staring at the intake manifold and engine I noticed a pipe at the back which obviously used to be connected to something, however I have no idea what. I could hold an unsteady idle (1500-2000) turning the throttle pulley, trying to figure out if I could do that somehow. Then something happened...I don't know why or how it did but it just did, I must have been possessed by the kit car God, looking over my build....I put my finger over the pipe, blocking it off....
I let go of the throttle and sat there as my finger slowly got sucked into the pipe...smoooooth idle! I let go and it died. Simple problem really. The intake wasn't getting a proper vacuum, hence the chaotic revs and cutting out.
I found a bit of rubber off-cut from the IVA covers for the steering arms, held on tight with a jubilee clip to prevent it being sucked in (shouldn't but better safe than sorry) and voila!
Engine was ticking over by itself!
Well you know what this means! In tribute to Tony Stark after building the Iron Man suit "Sometimes you gotta run before you can walk" I hoped in and had a little test up and down the driveway. It's only about 20-30 metres but it was enough to get the car driving under it's own power!
All the hard work and troubles I've had just melted away to be replaced by my HUUUGE grin! Just from crawling in first gear, I can already tell this is going to be a quick car. I just can't wait to get a chance to properly get it going.

Thursday, 15 August 2013
Exhaust Silencer.....supposedly.
I was going to leave the exhaust silencer off for as long as possible due to it sticking out and the chance of kicking it when I'm working around the car, but I decided it was time to put it on and get it out of the way storage wise.
The manifold needs to be trimmed back by around half in my experience (the end part where the silencer will attach over). I also split the silencer end by cutting two slots down the shaft to allow it to slide on and clamp down. Turned out the fit is pretty snug so some lubrication is advised. I settled on Vaseline (due to being used at work when building engines etc), so a healthy dollop of lube and a bit of man-handling, it was forced to fit....if you read that and chuckled, you are just filthy minded!
With the silencer forced on, it actually likes to sit very close to the side panel. Hence the bracket, bolted on to fit around the exit of the exhaust, it holds it in place, away from the bodywork and stops it sliding off the manifold.

Just got to add some exhaust wrapping to tidy it up a bit and cover sharp edges. The IVA can be quite strict on the retaining spring on the exhaust bracket so I've heard...
Now that the exhaust "silencer" is on, it was getting late and I wanted to put the car back in the garage before bed. I'm still waiting to hear what the sound is like on this machine but waiting for the coolant to be plumbed in before giving it a try.....well, that quickly went out the window. With the night coming in and wanting the car back in the garage, I just thought, well sod it lets go for it! Can't be bothered pushing it anymore.
Battery connected up, everything set, still got a bit of fuel left from checking the fuel pumps and system for leaks. Go for it!
A bit of cranking then BBRRRUUUUUUUMMMMMM! off it went...then clunk. Tried again, same happened. It would start up then cut out at idle, however it's fine if the revs are kept up. Initial thoughts were a fuelling issue, maybe there isn't enough but surely a few litres shouldn't cause that. Lack of pressure? Air bubbles in the system? Either way, the engine works and the noise pedal was quite sensitive with my big old work trainers on. Revs kept high, clutch up to reverse....found the biting point as I shot backwards...brakes work too. Got the car into the garage and let it cut out again.
Wow. What a noise. I have the lambda plug out so didn't help keep it quiet, maybe affected the engine cutting out. Anyway, it moves under its own power albeit temporarily. A bit of investigation the next day and I've found there is no power to either fuel pump. Looks like something has come loose. They worked when directly connected to the battery so time to find the wiring fault....thought I'd finished with this! Anyway, nearly there now!
The manifold needs to be trimmed back by around half in my experience (the end part where the silencer will attach over). I also split the silencer end by cutting two slots down the shaft to allow it to slide on and clamp down. Turned out the fit is pretty snug so some lubrication is advised. I settled on Vaseline (due to being used at work when building engines etc), so a healthy dollop of lube and a bit of man-handling, it was forced to fit....if you read that and chuckled, you are just filthy minded!
With the silencer forced on, it actually likes to sit very close to the side panel. Hence the bracket, bolted on to fit around the exit of the exhaust, it holds it in place, away from the bodywork and stops it sliding off the manifold.

Just got to add some exhaust wrapping to tidy it up a bit and cover sharp edges. The IVA can be quite strict on the retaining spring on the exhaust bracket so I've heard...
Now that the exhaust "silencer" is on, it was getting late and I wanted to put the car back in the garage before bed. I'm still waiting to hear what the sound is like on this machine but waiting for the coolant to be plumbed in before giving it a try.....well, that quickly went out the window. With the night coming in and wanting the car back in the garage, I just thought, well sod it lets go for it! Can't be bothered pushing it anymore.
Battery connected up, everything set, still got a bit of fuel left from checking the fuel pumps and system for leaks. Go for it!
A bit of cranking then BBRRRUUUUUUUMMMMMM! off it went...then clunk. Tried again, same happened. It would start up then cut out at idle, however it's fine if the revs are kept up. Initial thoughts were a fuelling issue, maybe there isn't enough but surely a few litres shouldn't cause that. Lack of pressure? Air bubbles in the system? Either way, the engine works and the noise pedal was quite sensitive with my big old work trainers on. Revs kept high, clutch up to reverse....found the biting point as I shot backwards...brakes work too. Got the car into the garage and let it cut out again.
Wow. What a noise. I have the lambda plug out so didn't help keep it quiet, maybe affected the engine cutting out. Anyway, it moves under its own power albeit temporarily. A bit of investigation the next day and I've found there is no power to either fuel pump. Looks like something has come loose. They worked when directly connected to the battery so time to find the wiring fault....thought I'd finished with this! Anyway, nearly there now!
Saturday, 10 August 2013
Bonnet, Nose Cone, Dashboard and Propshaft 2.0
First thing first, I now have my correctly sized propshaft returned from GBS and it's a perfect fit. Took a couple hours to get in due to not being able to slot it in between the diff and gearbox and having to drop the diff out. Easy I thought. Well, turns out that one of the nuts appears to have stripped the treads or cross threaded into a loop to the extent that it looked to be coming undone but in fact was just spinning on the bolt. Anyway, after a bit of angle grinding, I got the bolt out. Bit embarrassing when someone stated that I got the engine running.....it was actually my 1kW generator.....if it sounded like that I would not be impressed.
 Anyway, it's in and is looking good....if you ignore the wiring tape and mess, it still needs tidying up properly.

With that in, I hit the dashboard. Wanted to get this finished and in to start seeing what the car will be like when it's finished. If you've followed the blog religiously, you'll remember I bought some stainless trim to help cover up the mistakes/poor handiwork etc etc. Anyway, settled on black and covered the GRP with black too for the gaps. Finish product looked something like this:

From the driving position though, it covers part of the speedo...I'm not sure how strict they are with this as I shouldn't be driving at 100mph anyway....supposedly. Will double check this...

Gearbox also got filled with oil, the problem with this is the positioning of the filler plug. Not only is it a square plug (daft really, shredded knuckles getting that out!) it is also in the most awkward place ever! I had to bend a tiny funnel into the hole to get it in and then use a pipe to pour it in. 2 litres later and it's full, I'd lost track of time....
Top tip!
Do this before putting the foot well side panel on.

With the bonnet, an exhaust slot needs to be made. I have seen numerous blogs where a template is made, so an off cut of card did the job nicely. Drew the outline, hacksaw and file and got the rough shape I wanted. I had to re-adjust too and open up the back end a little bit

Not a bad fit in the end. I finished it off with a bit of the thicker black trim so looks like a nice curved finish. Hopefully its fairly heat resistant, otherwise something may have to replace it.

I also used the same for the ends of the bonnet, looks good, keeping the orange and black theme running a bit better than the chrome style trim.
 With the bonnet trial fitted, I next decided to whack on the nose cone. This was fairly straight forward, I lined up the two A-frames on either side of the chassis and marked up some holes. I tried for a rivnut in here but the sizing wasn't right so opted for M10 bolts and nuts. Currently I have just a plain nut, however I may upgrade this to a turret lock nut when it's finished....unsure yet as I'd need spanners to get it off.


I have seen a number of ways to do the bonnet catches. One recommended way was to fasten the bottom to a bit of wood or spare aluminium and use blue tack to figure out the closed positioning.
Pre fitted left, fitted right.
In my opinion, the easiest way is to attach the bottom (mine ended up in the top chassis rail) and measure upwards roughly to where the catch should sit, then add 5-10mm depending on how tight you want it. I used ratchet straps to pull the bonnet down and still added 5mm on, better to be tight than loose!
I've also added a strip of 3mm neoprene to the bonnet surface to add a bit of cushion and to be compressed to ensure a snug, tight fit.
Well then, bonnet, nose cone and dashboard are in. It's looking so much more car like now. Next up is the exhaust silencer as I get closer and closer to firing it up properly now. Don't want to upset the neighbours too much! rotational photos....go!
p.s. ignore the front cycle wings on top of the rear arches, they're just stored there until fitting.


Back in the garage safe and sound. I must say, seeing the car like this is just amazing and it's so hard to believe that 5 months ago, it was just a chassis. I have impressed myself with the speed at which this has been built, I am just looking forward to getting it finished and having a good drive in the sun with it.


With that in, I hit the dashboard. Wanted to get this finished and in to start seeing what the car will be like when it's finished. If you've followed the blog religiously, you'll remember I bought some stainless trim to help cover up the mistakes/poor handiwork etc etc. Anyway, settled on black and covered the GRP with black too for the gaps. Finish product looked something like this:

From the driving position though, it covers part of the speedo...I'm not sure how strict they are with this as I shouldn't be driving at 100mph anyway....supposedly. Will double check this...

Gearbox also got filled with oil, the problem with this is the positioning of the filler plug. Not only is it a square plug (daft really, shredded knuckles getting that out!) it is also in the most awkward place ever! I had to bend a tiny funnel into the hole to get it in and then use a pipe to pour it in. 2 litres later and it's full, I'd lost track of time....
Top tip!
Do this before putting the foot well side panel on.

With the bonnet, an exhaust slot needs to be made. I have seen numerous blogs where a template is made, so an off cut of card did the job nicely. Drew the outline, hacksaw and file and got the rough shape I wanted. I had to re-adjust too and open up the back end a little bit

Not a bad fit in the end. I finished it off with a bit of the thicker black trim so looks like a nice curved finish. Hopefully its fairly heat resistant, otherwise something may have to replace it.

I also used the same for the ends of the bonnet, looks good, keeping the orange and black theme running a bit better than the chrome style trim.


I have seen a number of ways to do the bonnet catches. One recommended way was to fasten the bottom to a bit of wood or spare aluminium and use blue tack to figure out the closed positioning.
Pre fitted left, fitted right.
In my opinion, the easiest way is to attach the bottom (mine ended up in the top chassis rail) and measure upwards roughly to where the catch should sit, then add 5-10mm depending on how tight you want it. I used ratchet straps to pull the bonnet down and still added 5mm on, better to be tight than loose!
I've also added a strip of 3mm neoprene to the bonnet surface to add a bit of cushion and to be compressed to ensure a snug, tight fit.
Well then, bonnet, nose cone and dashboard are in. It's looking so much more car like now. Next up is the exhaust silencer as I get closer and closer to firing it up properly now. Don't want to upset the neighbours too much! rotational photos....go!
p.s. ignore the front cycle wings on top of the rear arches, they're just stored there until fitting.


Back in the garage safe and sound. I must say, seeing the car like this is just amazing and it's so hard to believe that 5 months ago, it was just a chassis. I have impressed myself with the speed at which this has been built, I am just looking forward to getting it finished and having a good drive in the sun with it.
Friday, 2 August 2013
No Spark - On going log.
Well, as the title says, I am having trouble getting a spark from the engine. Asking around there are so many things that can be the problem. So enjoy the list!
This list is neither exhaustive nor specific. The problem could be a single problem or a collection of several.
Testing a couple of them is fairly straight forward and with simple tests can eliminate a few or leave you still looking for a solution but a little more direction on where.
Week of Saturday 27/07/2013 to Friday 02/08/2013
The route I took was measuring the earth points and ensuring power to the pack. Rumour has it that old 1.8 Mx5s had a problem with the coil packs where they would burn out if the ignition was left on but not running for a prolonged period. I must admit, figuring my lights out, it had been, plus with filling with fuel to ensure the air was as cleared out as much as possible. Despite the 1.6 versions not seeing this problem, on a 23 year old coil pack, it was a possibility anyway. Plus removing the HT leads revealed a rather sorry looking pack which had melted a bit and build up of electric dusting of some sort on the connections.
First thing to test was the earth connection. Remove all the spark plugs, lay the body of the plug on the chassis to ensure a good earth or link straight back to the negative terminal on the battery and crank it over.
My pack has arrived today, Friday 02/08/2013, so this weekend, hopefully the engine will be running....or at least make sure I am sparking as I haven't plumbed in any coolant hoses. Would hate to cook the engine before I'm even finished or spew any leftover coolant all over the engine bay! Probably just make sure I have a spark is the main thing....
Weekend Saturday 03/08/2013 > Sunday 04/08/2013
Ok, so new coil pack fitted, HT leads and spark plugs. After properly removing my old coil pack, it really did look bad, melted and build up of sh*t where the HT leads attach. Well that must have been the problem, burnt out and generally knackered.
Plugged in and ready to go.....nothing. Still no spark :(
Stuart (theduck - Rhocar) offered to come and check that it wasn't something obvious like a bad earth connection, however still have a load of head scratching and some proper checking, still no spark.
We settled that the ECU is the only thing that we need confirming to work considering all my power connections appear to be right, and is the only thing left from the separate donor that I don't know if it was actually running or not. So my plan is to take that to an MX5 breaker I know of and see if they will plug it in and try, see if it is working or not.
However, Stuart being stumped and having it bug him as to why is wasn't working, found a forum post from an MX5 forum which had similar issues and concluded it to be a faulty Mass Air Flow sensor. Now I wouldn't have thought this would be an issue and has caught a couple of guys by surprise, but for £30 second hand "tested and working", it is worth a shot. That is due to arrive this week. I can live with a second hand unit that is suppose to be working due to a brand new one costing £450!! :O
Anyway, coolant pipes are due to arrive the same time so will plumb that in properly before trying again, worse thing is getting it running and then cooking the engine!
Watch this space!
Anyway, the cause for the MAF sensor preventing a spark is unclear. My understanding is that the sensor was causing the ECU to register no air flow, so possibly prevented putting in fuel and/or a spark. Other than that, I can't figure out the actual reason but it's sorted now so that answer will do.
Onwards and upwards!
- Poor earth connection
- Faulty spark plugs
- Faulty HT leads
- Faulty coil pack
- Faulty Mass Air Flow sensor (MAF)
- Faulty Cam(shaft) Angle Sensor (CAS)
- Faulty Crank(shaft) Position Sensor (CPS)
- Faulty ECU
- Built in immobiliser
- Incorrect Wiring
- Rust/Corrosion on connections etc.
- Mx5 common fault of the coil pack
- Starter motor issues
- Various sensor issues
- Faulty Relays
- Ignition/Power feed issues.
This list is neither exhaustive nor specific. The problem could be a single problem or a collection of several.
Testing a couple of them is fairly straight forward and with simple tests can eliminate a few or leave you still looking for a solution but a little more direction on where.
Week of Saturday 27/07/2013 to Friday 02/08/2013
The route I took was measuring the earth points and ensuring power to the pack. Rumour has it that old 1.8 Mx5s had a problem with the coil packs where they would burn out if the ignition was left on but not running for a prolonged period. I must admit, figuring my lights out, it had been, plus with filling with fuel to ensure the air was as cleared out as much as possible. Despite the 1.6 versions not seeing this problem, on a 23 year old coil pack, it was a possibility anyway. Plus removing the HT leads revealed a rather sorry looking pack which had melted a bit and build up of electric dusting of some sort on the connections.
First thing to test was the earth connection. Remove all the spark plugs, lay the body of the plug on the chassis to ensure a good earth or link straight back to the negative terminal on the battery and crank it over.
- A spark means you have an earthing issue.
- No spark means you have eliminated the main cause that it isn't only an earthing problem.
My pack has arrived today, Friday 02/08/2013, so this weekend, hopefully the engine will be running....or at least make sure I am sparking as I haven't plumbed in any coolant hoses. Would hate to cook the engine before I'm even finished or spew any leftover coolant all over the engine bay! Probably just make sure I have a spark is the main thing....
Weekend Saturday 03/08/2013 > Sunday 04/08/2013
Ok, so new coil pack fitted, HT leads and spark plugs. After properly removing my old coil pack, it really did look bad, melted and build up of sh*t where the HT leads attach. Well that must have been the problem, burnt out and generally knackered.
Plugged in and ready to go.....nothing. Still no spark :(
Stuart (theduck - Rhocar) offered to come and check that it wasn't something obvious like a bad earth connection, however still have a load of head scratching and some proper checking, still no spark.
We settled that the ECU is the only thing that we need confirming to work considering all my power connections appear to be right, and is the only thing left from the separate donor that I don't know if it was actually running or not. So my plan is to take that to an MX5 breaker I know of and see if they will plug it in and try, see if it is working or not.
However, Stuart being stumped and having it bug him as to why is wasn't working, found a forum post from an MX5 forum which had similar issues and concluded it to be a faulty Mass Air Flow sensor. Now I wouldn't have thought this would be an issue and has caught a couple of guys by surprise, but for £30 second hand "tested and working", it is worth a shot. That is due to arrive this week. I can live with a second hand unit that is suppose to be working due to a brand new one costing £450!! :O
Anyway, coolant pipes are due to arrive the same time so will plumb that in properly before trying again, worse thing is getting it running and then cooking the engine!
Watch this space!
Friday 09/08/13
Success!!!
After fitting the "new" MAF sensor, the spark plugs sparked up first time! Big thanks to Stuart (theduck - Rhocar) for finding the relevant thread that suggested this solution. It now means I can really crack on with the build over the rest of the weekend instead of worrying about a knackered engine :) I am yet to give it a proper fire up due to not having the coolant plumbed in fully. Last thing I need now is to cook the engine!Anyway, the cause for the MAF sensor preventing a spark is unclear. My understanding is that the sensor was causing the ECU to register no air flow, so possibly prevented putting in fuel and/or a spark. Other than that, I can't figure out the actual reason but it's sorted now so that answer will do.
Onwards and upwards!
Sunday, 21 July 2013
Electrics moving on...
Well, they are kind of moving on. I haven't posted much about it so far due to been busy and nothing major being completed with any haste. I am finally struggling with the build and it is at the part I knew I was least confident with...the electrics.
I have slowly been working my way through it, blindly but logically getting there. A few things were easy to identify and learning new skills about chopping and re-working wires etc, I have become confident I can split and splice wires and still get them to work. Plus I've learnt a lot about how a circuit works....which when starting with nothing isn't bad going.
Just a quick recap. The place I last left of was looking something like this:

The electrics laid over the car in roughly the right place, plugging in what fits and trying to identify things with the aid of in vehicle positioning, which I must admit, worked better than expected. At this stage, we have the engine cranking and power (of the electrical variety) running through the system.
I think I will start by telling you what I tasked myself to do up until this point in time.
How the plan actually went...plus problems and the solutions...if any:
Picture Time!


Another issue I've been having, more recently, is the flooding of my garage. These tropical thunderstorms are playing havoc! It never seemed to be a problem in the winter....It's ok, I can wheel the car out, sweep the water away (a valuable skill I have perfected - Noah, eat your heart out!) and then work on the car in the sun. It's not the way first choice of enjoying the car in the sun but I'll have plenty of time for that soon.
The rear arches were also put on, there is a strip of trim on the inside between the side panel and the GRP, the tadpole trim I think it's called. flat edged with and tube on the end. Adds quite a nice effect with the orange.

A little bit of a side view of the car, never had one of these before. I must admit, looking at it on the drive like it is, just gives me a great feeling that one day, it will be a full car. Looking good!

Plenty of room for bigger wheels. I will use the standard MX5 wheels to begin, plenty of tread left and the Bank of Zach running low and the Bank of Dad is not open for business. So they can wait. They are currently 195 width, and R14 or R13s I believe. Will look at increasing the width, that's a definite. The radius, well I reckon I can increase an inch or two, but will have to look into the pros and cons.


I have slowly been working my way through it, blindly but logically getting there. A few things were easy to identify and learning new skills about chopping and re-working wires etc, I have become confident I can split and splice wires and still get them to work. Plus I've learnt a lot about how a circuit works....which when starting with nothing isn't bad going.
Just a quick recap. The place I last left of was looking something like this:

The electrics laid over the car in roughly the right place, plugging in what fits and trying to identify things with the aid of in vehicle positioning, which I must admit, worked better than expected. At this stage, we have the engine cranking and power (of the electrical variety) running through the system.
I think I will start by telling you what I tasked myself to do up until this point in time.
- Fuel Pumps - Get these pumping fuel through the system, always a good way to check for leaks.
- Headlights/Sidelights - Might need these I guess
- Indicators - For decoration, nobody really uses these do they?
- Cooling Fan - For when speed just isn't enough.
- Rear Combi-lights - If anyone has kept up, I suppose it's fair to let them know I'm stopping...
- Reverse light - To show people I'm coming out of the hedge
- Fog light - Well it is Britain.
- Engine Running! - Or at least have it ready to run, need to sort out my coolant pipes first though, can't have any left over coolant spewing out!
How the plan actually went...plus problems and the solutions...if any:
- Fuel Pumps, working...but on occasion they continue to work even with the key removed from the ignition. I sorted it but messing a bit later it has come back, but they work and the wiring isn't complete yet so not an issue currently. They work, that's the main thing.
- Headlights/sidelights - originally had sidelights as indicators, but solved that (wrong wire, was 50/50) headlights worked....then blew 5 fuses. Became apparent that with twisting the headlights to save walking around the car to check, I had created a short from the connectors due to a lack of individual insulating tape. Sorted it and it all working.
- Indicators are all working and worked first time including the hazard button. But I will have to adapt that to fit on the car somewhere as it still has the headlight pop-up switch attached.
- Cooling fan - is on and wires identified. Just trying to understand what goes where and what fuses are used. May try looking at a working MX5 somewhere...needs more research.
- Rear Combination Lights need to be 90 degrees to the road, hardest part was doing this myself, much easier with 2 people but it looks there by eye, don't know exactly what the tolerances are though. But they work and brake lights come on at the right time
- Reverse and Fog lights. Well, I have identified the reverse light wire....I think. Plug it in and see is the option. Fog light, well, I haven't the foggiest (Pun intended) for what wire this is. All I know is that I need a tell tale sign on the dash or button. Looking into that currently, I have a but to use for now though.
- Engine Running. Well this is where my biggest problem lies. I can't seem to get a spark. This is such a big topic and many pointers for future reference, I will write a separate post for it.
Picture Time!


Another issue I've been having, more recently, is the flooding of my garage. These tropical thunderstorms are playing havoc! It never seemed to be a problem in the winter....It's ok, I can wheel the car out, sweep the water away (a valuable skill I have perfected - Noah, eat your heart out!) and then work on the car in the sun. It's not the way first choice of enjoying the car in the sun but I'll have plenty of time for that soon.
The rear arches were also put on, there is a strip of trim on the inside between the side panel and the GRP, the tadpole trim I think it's called. flat edged with and tube on the end. Adds quite a nice effect with the orange.

A little bit of a side view of the car, never had one of these before. I must admit, looking at it on the drive like it is, just gives me a great feeling that one day, it will be a full car. Looking good!

Plenty of room for bigger wheels. I will use the standard MX5 wheels to begin, plenty of tread left and the Bank of Zach running low and the Bank of Dad is not open for business. So they can wait. They are currently 195 width, and R14 or R13s I believe. Will look at increasing the width, that's a definite. The radius, well I reckon I can increase an inch or two, but will have to look into the pros and cons.

Continuing the 360 (minus a few degrees) view of the car currently. Still no handbrake kit :(


Looking better and better with every day. Just got to keep wiring a few things in and ensuring everything works. Main hurdle is the engine. Once this is running, this will quickly come to an end. It's been one hell of a learning curve so far, and I have loved every minute. Just can't wait to be able to drive this beauty!
Monday, 15 July 2013
Electrical Progress!
With all this sunny weather and the car rolling, I felt it was the perfect opportunity to utilise the sun to help see some of the darker places on the car. Therefore, I managed to roll the car out the garage and into the sun.

Yes I am using the jacks as bump stops due to the handbrake still not been finalised by GBS, it's on my shopping list of things that GBS still need to complete.
You may also notice the headlight cases are in....yeah that was boredom and for a little more effect.

Just got a few more things to wire up then I can start the tidying up process....now that will be a pain!
I have been determined to get the engine to crank on the starter motor since starting the electrics. In my eyes, that's the first thing I want to check, everything else can wait until the engine is running.
Anyway, after a few battles and plugging things in....I have managed to get it connected up! Happy days! Now we are getting somewhere! This video will show nicely (providing it works)
I have been told many times and will also tell you. The electrics are not a quick job. I have spent many hours going through and figuring what's what, looking between wiring diagrams and the actual wires and slowly getting somewhere, it may seem daunting but after today, it's been worth it and given me that new found motivation yet again. Next up is the fuel pumps and the radiator 12" fan that is due to arrive tomorrow. Then we'll be ready to try for the engine running.....getting worried now Mum???

Yes I am using the jacks as bump stops due to the handbrake still not been finalised by GBS, it's on my shopping list of things that GBS still need to complete.
You may also notice the headlight cases are in....yeah that was boredom and for a little more effect.
Just got a few more things to wire up then I can start the tidying up process....now that will be a pain!
I have been determined to get the engine to crank on the starter motor since starting the electrics. In my eyes, that's the first thing I want to check, everything else can wait until the engine is running.
Anyway, after a few battles and plugging things in....I have managed to get it connected up! Happy days! Now we are getting somewhere! This video will show nicely (providing it works)
I have been told many times and will also tell you. The electrics are not a quick job. I have spent many hours going through and figuring what's what, looking between wiring diagrams and the actual wires and slowly getting somewhere, it may seem daunting but after today, it's been worth it and given me that new found motivation yet again. Next up is the fuel pumps and the radiator 12" fan that is due to arrive tomorrow. Then we'll be ready to try for the engine running.....getting worried now Mum???
Monday, 8 July 2013
Dashboard
Those of you that have been following my blog carefully, will understand that my garage is not limited to just the garage. My lounge is simply an extension of my garage but with electricity, warmth, sofas and a telly, for all those small tasks that don't need to be attached to the car.
Toying with the idea of the Mazda instrument cluster, I have decided on a central position as to provide an even look, and also to avoid the steering wheel blocking the view, as many IVA fails I have seen include this....I should be safe.
Having searched high and low for the correct sized holesaws, I settled on drilling a number of holes around the template border and then filing through. This isn't advised but it actually worked really well, no chips or cracks. However, the filing has left some....let's say, non-perfect-circular holes.....nonetheless, I have seen a stainless steel MX5 cluster surround, which I have purchased and sprayed with plastidip (basically a spray on rubber coat, which will peel off if I change my mind).
These are the results:

A plain look, I thought this would look pretty good....it would have done if the holes were decent and in the correct place, that square one at the bottom was a tough one to get anyway.

The stainless steel panel. Looks ok, but the holes would need a proper sorting out first.

And finally black. I think it looks good and goes with the orange nicely (excuse the flash, ruins the colour a bit).
I plan to spray the dashboard under the surround with plastidip too which will blend the surround in as well as looking less tatty....maybe the finished product will look amazing....time will tell. Still need to get some Perspex on order to cover the dials too.
Toying with the idea of the Mazda instrument cluster, I have decided on a central position as to provide an even look, and also to avoid the steering wheel blocking the view, as many IVA fails I have seen include this....I should be safe.
Having searched high and low for the correct sized holesaws, I settled on drilling a number of holes around the template border and then filing through. This isn't advised but it actually worked really well, no chips or cracks. However, the filing has left some....let's say, non-perfect-circular holes.....nonetheless, I have seen a stainless steel MX5 cluster surround, which I have purchased and sprayed with plastidip (basically a spray on rubber coat, which will peel off if I change my mind).
These are the results:

A plain look, I thought this would look pretty good....it would have done if the holes were decent and in the correct place, that square one at the bottom was a tough one to get anyway.

The stainless steel panel. Looks ok, but the holes would need a proper sorting out first.

And finally black. I think it looks good and goes with the orange nicely (excuse the flash, ruins the colour a bit).
I plan to spray the dashboard under the surround with plastidip too which will blend the surround in as well as looking less tatty....maybe the finished product will look amazing....time will tell. Still need to get some Perspex on order to cover the dials too.
Sunday, 7 July 2013
Rear Panel and Fuel Tank
To take a break from the electrics, I decided it was finally time to sort the fuel tank out after buying some rubber cork to help seal the unit in. I have re-used the MX5 sender unit with a couple of adaptions: shortened float arm to fit and fuel pump removed. I have then used the black glue stuff from GBS to bond the fuel tank to the chassis, however I may add some straps too, can't think what the IVA required off the top of my head.
I also finally fitted the rear panel after a fair amount of bending, cutting and filing. I know it's not pretty and could have been done much neater but it's on and appears to leave plenty of room now instead of the bare minimum/clashing. Anyway, the arches, wheels and a bit of trim will hide the mess.
A couple of pictures to see the final outcome from the back.


This would have been a much easier job with two people but a few clamps and tactically placed rivets helped keep the thing together.
I also finally fitted the rear panel after a fair amount of bending, cutting and filing. I know it's not pretty and could have been done much neater but it's on and appears to leave plenty of room now instead of the bare minimum/clashing. Anyway, the arches, wheels and a bit of trim will hide the mess.
A couple of pictures to see the final outcome from the back.


This would have been a much easier job with two people but a few clamps and tactically placed rivets helped keep the thing together.
Thursday, 4 July 2013
Who needs electrics?
So it has been quite a while again, I've hit a slow, complicated point for myself with the car and working flat out getting my placement portfolio completed for University, plus a week and a bit off enjoying the sun and drinking lots of beer at Glastonbury, but enough of my excuses, you're here for the car, not my life story!
As the title says I am currently doing battle with the electrics on my kit car. I have spent many a night stripping back the old wiring which I have reused from the MX5. My original plan was the use the GBS wiring looms but looking at around £1000 just to buy all the parts required and then still have to adapt certain areas to fit the MX5 parts I decided to save myself that money and stick with the MX5 loom...obviously this has opened up a whole new can of worms...but it's increasing my learning and saving money...well that's what I keep telling myself!
To the shock and horror of my father, (who was starting to think my lounge was no longer a garage), he came home one night to this:

I must say, there are plenty of other worse things I could be doing so he resigned himself tohelping me out and giving me all the help I could need a glass of wine and an early night!
After a number of nights cutting 20 year old PVC tape and cable ties, I have got down to the bare wires. I had retrived wiring diagrams to help identify what parts were what, but after getting very confused and headache setting in, (it was my first time, they weren't gentle) I decided to resort to the plug in and see what happens ritual. Having a rough idea of what came from where I lay the electrics out over the car. Somethings were easy, other bits not so. This is where I am needing to resort back to the diagrames but this time, it's a little easier - only time will tell.


My plan is to get everything plugged in and see what happens. Ideally I will be able to have guessed most things right first time so there wont be much change. At least it will give me a rough idea of what goes where and if I was right. Basically working on an elimination process, as at the moment it is just highly overwhelming.
 Update a few weeks on....
Slowly but surely things are getting plugged in. Trying to understand what bit I will need on the car and finding them is proving to be the easier option than finding a wire and following the diagram or vice versa. Generally, plugs only have one clip to go into to avoid crossed wires....or that is was it's feeling like!
I have managed to get to a stage where I believe the engine should be able to turn over (not adding fuel or oil yet I don't want to start her up just yet) but I wanted to see if I had the starter and ignition all wired up correctly. Anyway, one day, needing that bit of inspiration to keep myself motivated I thought I'd give it a go. Battery connected up, all wires I thought would be needed plugged up and turn the key....................nothing....conclusion = dead battery. Luckily, I had managed to find a battery charger in my Granddad's garage so that came to good use, charging the battery in the evening to try again in the morning. (Unplugged the charger overnight for safety reasons) but tried again anyway the next day....still nothing. Conclusion number 2 = Battery is knackered and not holding a charge.......or I need to sort more ground/earth points out too.
Going to go with the last option and try again with a battery fresh off the charge, don't want to buy a new one to have that sit around for another couple months. Anyway, I got the motivation I wanted, but not the way I would have liked, I must now fix this, I will fix this, I will WIN......eventually.
As the title says I am currently doing battle with the electrics on my kit car. I have spent many a night stripping back the old wiring which I have reused from the MX5. My original plan was the use the GBS wiring looms but looking at around £1000 just to buy all the parts required and then still have to adapt certain areas to fit the MX5 parts I decided to save myself that money and stick with the MX5 loom...obviously this has opened up a whole new can of worms...but it's increasing my learning and saving money...well that's what I keep telling myself!
To the shock and horror of my father, (who was starting to think my lounge was no longer a garage), he came home one night to this:

I must say, there are plenty of other worse things I could be doing so he resigned himself to
After a number of nights cutting 20 year old PVC tape and cable ties, I have got down to the bare wires. I had retrived wiring diagrams to help identify what parts were what, but after getting very confused and headache setting in, (it was my first time, they weren't gentle) I decided to resort to the plug in and see what happens ritual. Having a rough idea of what came from where I lay the electrics out over the car. Somethings were easy, other bits not so. This is where I am needing to resort back to the diagrames but this time, it's a little easier - only time will tell.


My plan is to get everything plugged in and see what happens. Ideally I will be able to have guessed most things right first time so there wont be much change. At least it will give me a rough idea of what goes where and if I was right. Basically working on an elimination process, as at the moment it is just highly overwhelming.

Slowly but surely things are getting plugged in. Trying to understand what bit I will need on the car and finding them is proving to be the easier option than finding a wire and following the diagram or vice versa. Generally, plugs only have one clip to go into to avoid crossed wires....or that is was it's feeling like!
I have managed to get to a stage where I believe the engine should be able to turn over (not adding fuel or oil yet I don't want to start her up just yet) but I wanted to see if I had the starter and ignition all wired up correctly. Anyway, one day, needing that bit of inspiration to keep myself motivated I thought I'd give it a go. Battery connected up, all wires I thought would be needed plugged up and turn the key....................nothing....conclusion = dead battery. Luckily, I had managed to find a battery charger in my Granddad's garage so that came to good use, charging the battery in the evening to try again in the morning. (Unplugged the charger overnight for safety reasons) but tried again anyway the next day....still nothing. Conclusion number 2 = Battery is knackered and not holding a charge.......or I need to sort more ground/earth points out too.
Going to go with the last option and try again with a battery fresh off the charge, don't want to buy a new one to have that sit around for another couple months. Anyway, I got the motivation I wanted, but not the way I would have liked, I must now fix this, I will fix this, I will WIN......eventually.
Sunday, 9 June 2013
They See Me Rollin'
Massive milestone today! We have touch down!


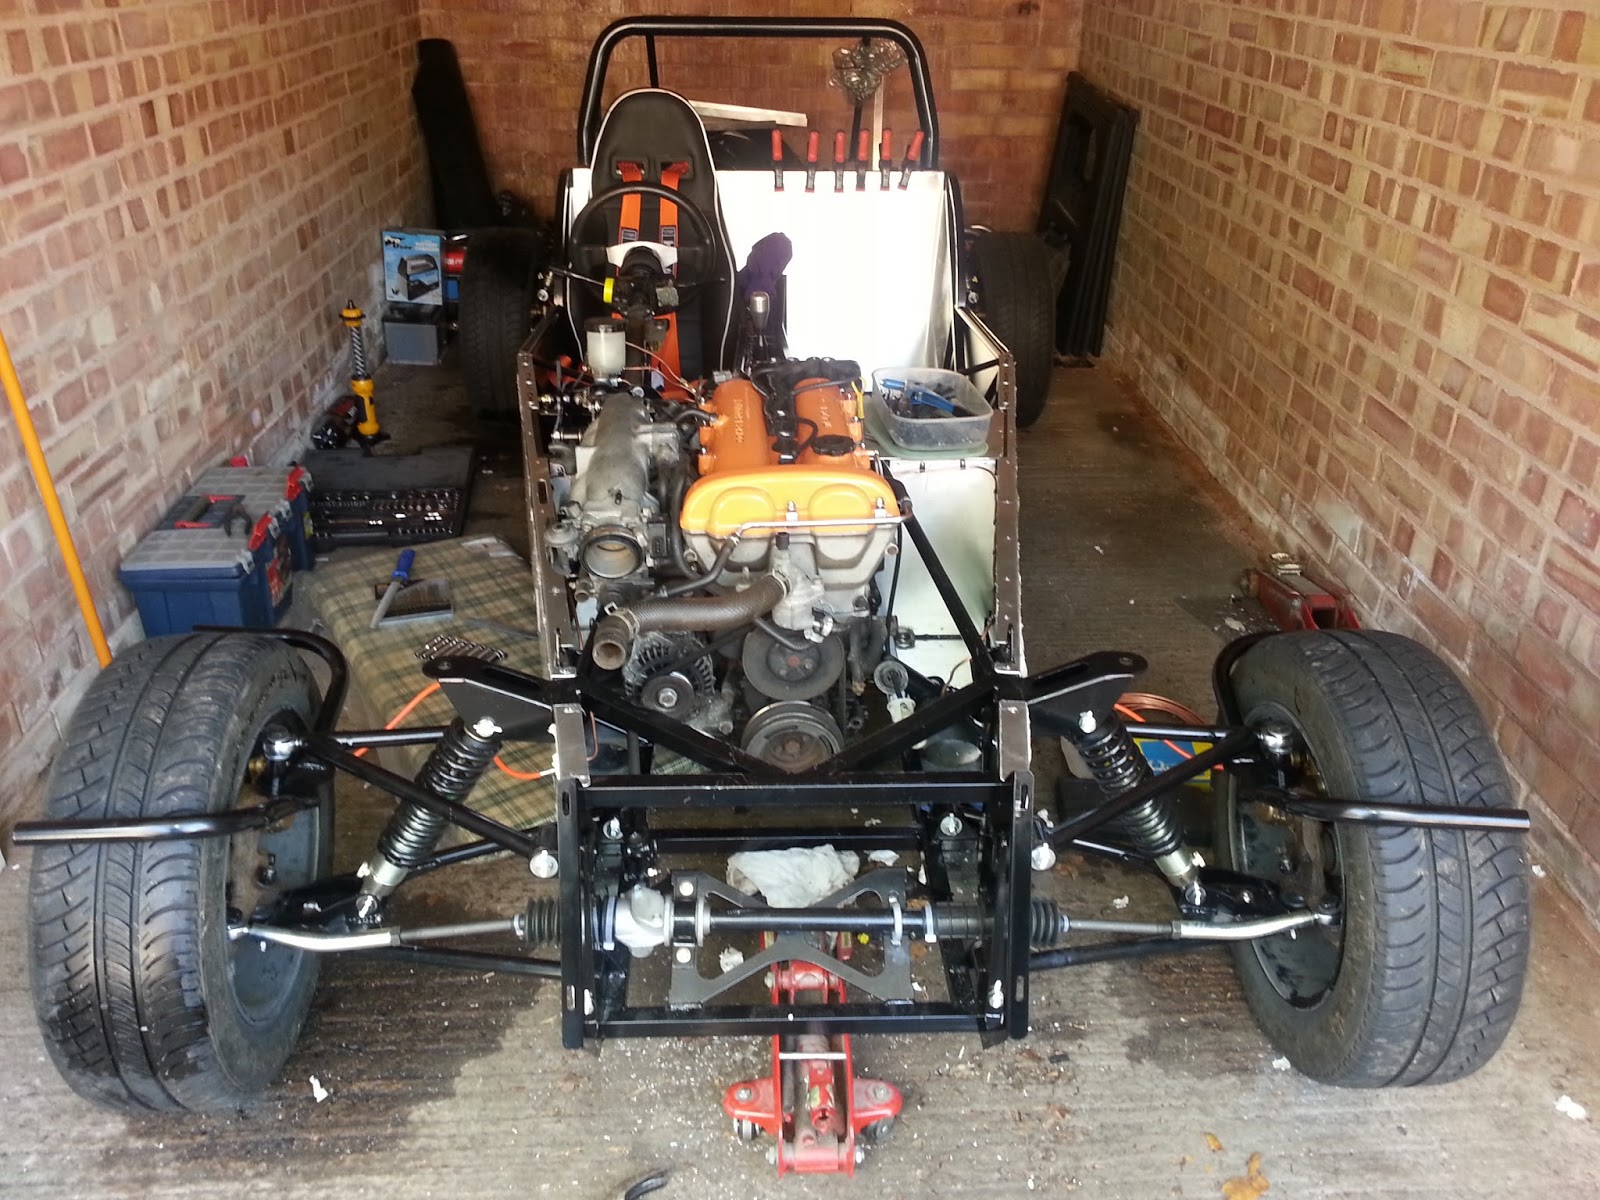
As you can see here, the chassis is now rolling and the real size of the car is coming to light. Big thanks to Adam (Mate from Uni) for helping out and also to Dan (brumster - RHOCaR) for lending me the engine crane to do so!
Below are a selection of photos telling you of the story of how the above photos were achieved. It started off with lifting the chassis at the centre point of the transmission tunnel where the frame begins to expand under the dashboard. 50-50 weight balance supposedly.... yeah right! Squeaky bum time as the car was lifted off the stands and made a break for the wall!


In the end, it was down safely. As the steering wasn't connected and I am still waiting on a handbrake from GBS, I made the toe quite extreme to avoid any unwanted getaways.


With the frame on the floor, it was only natural to sit in the car as seen above.....and so much fun! Just a taster of what is to come I hear.
Anyway, after manoeuvring the engine crane back out of the garage, the next step was the engine. Luckily I had been able to strip the MX5 in a garage in Cannock and build the Zero in Tamworth. Which was great until I had to transport the engine in the back of a van. Nearly as nervy as the time I picked up the kit! Every bang and crash brings that extra little bit of panic...but it all was ok and in it goes - as one with the gearbox, easier that fiddling about with bolting them back together.


Some slight adjustments on the mounting points. These for the Mazda fit one way and one way only. They ARE different and will only fit on the 4 holes they were designed to. We had tried to fit the mounts on the block and then lower the engine in, however with a number of clashes (air intake and alternator), a single mount was removed and whilst one was located, then the other one was fitted and pulled the engine square. So simply, fit the hardest to reach mount, then fit in the easier side as the engine is getting close.

Fitting the gearbox was interesting. We had swapped the mount around a number of times (reason will come later) which cause a lot of trouble...especially when we had it right first time! Anyway, the engine was now in and looked to be all ok and in the right position.......
 Even the steering shaft was looking tight but is ok....
So what's the problem I hear you say.....................???
Well....
 The propshaft wasn't fully connected. It was originally thought we had the gearbox mount the wrong way round, that would give us the distance needed...but the engine mounts were already at the right point...so it was swapped again...then out again to tidy up the location slot and increase the length of it just a bit thinking that was the problem...back on and still no (it helped with the engine mounts to be fair) so what on earth could it be?
It would appear that the propshaft supplied by GBS is actually too short but that couldn't be right......A double check of the mounts, some measurements and head scratching and a quick tea break and still no solution. I was really starting to doubt myself now.
A quick mental checklist was done:
- Engine mounts were located in the correct place
- Gearbox mount (despite numerous changes) look right
- The engine appears to be generally in the right place from memory of other Zeros
- The gear stick is in a comfortable place
- The engine can't actually move back any further (or far enough) due to it begin to clash with the chassis.
So with all this in mind, a call to GBS was made. Richard, also scratching his head, dug out his measurement notes: Diff prop flange to gearbox oil seal = 640mm
Mine = 680mm. Ah well there is the problem!
I must have something wrong....but as said above, I can't see anything out of place. Richard also agrees from the pictures sent. Possibility of the diff being a different flange plate due to limited slip? Quite likely...Richard is on the case! Update! Richard has got back to me and established that the nose of the limited slip diff (that I use) is 40-50mm shorter than the one GBS have used. New propshaft is required.
Anyway, undeterred, the steering was linked up and the wing bracket bolts tightened up now they are on the floor and running closer to their proper height


Anyway, all in all, a very successful weekend! The car is now clearly a car and a major milestone has been achieved. Next step is the electrics. Aim is to get the engine ready to run and lights all working. This will be the frustrating and long process. Can't say I'm looking forward to it as I really am going in blind, but the end goal will keep me calm and focused. I now have a place to sit and think (and pretend to drive) when things are needing a break. Overall, I am a very happy chappy! Just getting to this stage is worth all the cuts and bruises and scuffs and bangs and pain...the list goes on.

Subscribe to:
Posts (Atom)