Saturday 4 June 2016

Hello Electrics My Old Friend...

I think I have previously mentioned that the electrics was a major player in the decision to embark on this rebuild. For those who did not see the original car or cannot recall the pictures I have shown here, I'll fill you in quickly.

My original wiring was an abomination!!!!

Yep. Filled in. My problem was not having much knowledge or care for electrics. Plus deciding to save money in the build I reused the original MX5 wiring to aid getting the car up and running.
  • Problem 1. There was a lot of wiring not actually required from the MX5 that remained in the loom = Excess weight.
  • Problem 2. There was large sections of wires not covered with anything to protect or tidy them up = Potential short and a bit rubbish.
  • Problem 3. To solve Problem 2, I just wrapped everything in orange electrical tape (colour coordinated you see!) including cable tied chunks of Problem 1 which also got wrapped into an orange clump of ugly = Rather aesthetically shocking - pun intended.
Look at that beautiful wiring tape!

Strangely, I never had any electrical issues, so why take out something that works? Well I got to the stage of trying to avoid taking the bonnet off due to the unsightly mess that the wiring was. Unfortunately, car enthusiasts, being the strange animals we are, always wanted the bonnet off to check out the heart of the machine in front of them. Queue awkward "ignore the wiring" comments....


Under the dashboard/scuttle was no better!


With the old engine removed, you can see the extent of wiring remains. I am truly pleased to be getting rid!


Initially the plan was to build my own loom, cutting the size down immensely. However I had neither the knowledge, patience, time nor desire to do truly this...or learn to do this for that matter. Quick look to RapidFit Looms and their standard 7 style loom was a price worth saving the effort of my own loom. Hand in hand with a standalone Microsquirt ECU to control the engine on its new throttle bodies, Jez (RHOCAR) came and helped me throw away the MX6 loom and set me on my way with the new stuff!


Yes the wheel is upside down.......still building!
It is already so much better looking than my original loom, ok it's spread out but there is less to spread out! It also is pretty straightforward to plug and play with virtually everything between Rapidfit, car and Microsquirt after a bit of thought. So credit where credit is due to RapidFit, MicroSquirt and Jez! Once everything is working I will begin making it neat and tidy. No more ghastly orange tape bulk wrapping!

Don't hold your breathe though, this may take a while!

Sunday 24 April 2016

The Push For Stoneleigh 2016

For an engine swap that I was hoping would only take a couple months, Stoneleigh has crept up pretty quickly. Now the car is a long way off being finished but there is nothing better than going to one of the few remaining National Kit Car Shows, especially 15 minutes from your doorstep. Unfortunately there was a lot going on away from the kit car which took priority. Nevertheless there was still a final push to get the car to Stoneleigh on the basis it would be finished off properly afterwards. This meant, original intake manifold, wiring, ECU and even speedo was dropped into the car to try and get the thing to run. If it ran, it could drive and if it could drive then it would be at Stoneleigh......

However...whilst the car was still in pieces and I could afford a weekend for it to dry being busy elsewhere, a new paint job. Looks are everything, if its going to look incomplete (albeit a valid observation), it can at least sport the new colour scheme. I fully intend to keep the orange (closest OEM colour to this I can find is VW Brilliant Orange) so required something to compliment it nicely. The bare aluminium was tatty and required far too much upkeep. I decided black was over done, silver wasn't much of a change and carbon fibre vinyl wrap was a tad tacky. So, a dark-ish grey maybe? Step up BMW Sparkling Graphite. Colour coding the body to the cam covers. Whilst the pictures do not do it justice, it is quite spectacular when the sun hits it.


Other than tarting the car up, I also needed to address the best way to get the car running. As with the MX5, I felt this could be achieved from essentially lifting everything from the MX6 to the Zero. Engine, intake, alternator, wiring, the lot.


Even the intake gets a lick of paint! Although once fitted, a problem makes itself clear. The intake manifold isn't going to fit with the bonnet on.


The bonnet is not a problem though. I felt the short drive without a bonnet would be ok, any issues and its just been nicked by some pikeys this morning, officer. However, that was the least of my worries. The original alternator would not fit. The mounting point on the engine meant that it would need to sit with a chassis rail running through the middle of it. So that won't work. New DIY bracket and smaller alternator (Desno 40A unit) and that is that ticked off. So far so go right? Problem - Solution. Things are looking likely for Stoneleigh. Even the oil filter having it's place stolen by one of the new engine mounts wasn't going to stop me. A relocation kit ant and some fancy stainless braiding and happy days again!


Next up is the exhaust. I wanted to keep the up and over look of the original design, however this was not going to be possible without some major bends and fabrication.

This shows how little space there is to actually get the exhaust in.and has resulted in the requirement to come through the side panel. Again this led to many options. Do the pipes come together inside the engine bay or outside? Simple answer was outside. There really is limited room in the engine bay now.


So here is the plan. 3 tubes eventually merging into one. 45 degree bends ordered (30 didn't give enough and 60 was too much) 45 made t possible to run back down the side of the car.


Here is the basic mockup. I've opted to use bike silencers for the sole reason of being so much cheaper! Plus I can have the exhaust run short. I quite like it.


Manifolds all welded up. Plan is to get the car running with mild steel, then with the car running, I can whip them off and take them somewhere to be copied in stainless. Easier than sacrificing the car for however long. Plus the fact I was originally quoted £1200 for a full custom system! At least this route saves money and takes out the design costs!


So comparing new to old, I'm still unsure. I like the old system but also like the stubby nature of the new design. Only time will tell when the car is on the road and sound tested will I know if it's any good (the plan is to track the car a lot more so will need to ensure it falls below the 95-105db ratings for specific tracks)

Slowly getting there, but beginning to take shape again. It may look like a car but its far from working like one!


The last major item needed to look at getting the car running was the fuel tank. Unfortunately I was having serious issues with my fuel sender leaking and splashing fuel all over the place. I'd tried a number of fixes, even resorting to chemical metal to just seal the thing in! Alas, even that failed to stop the leak.

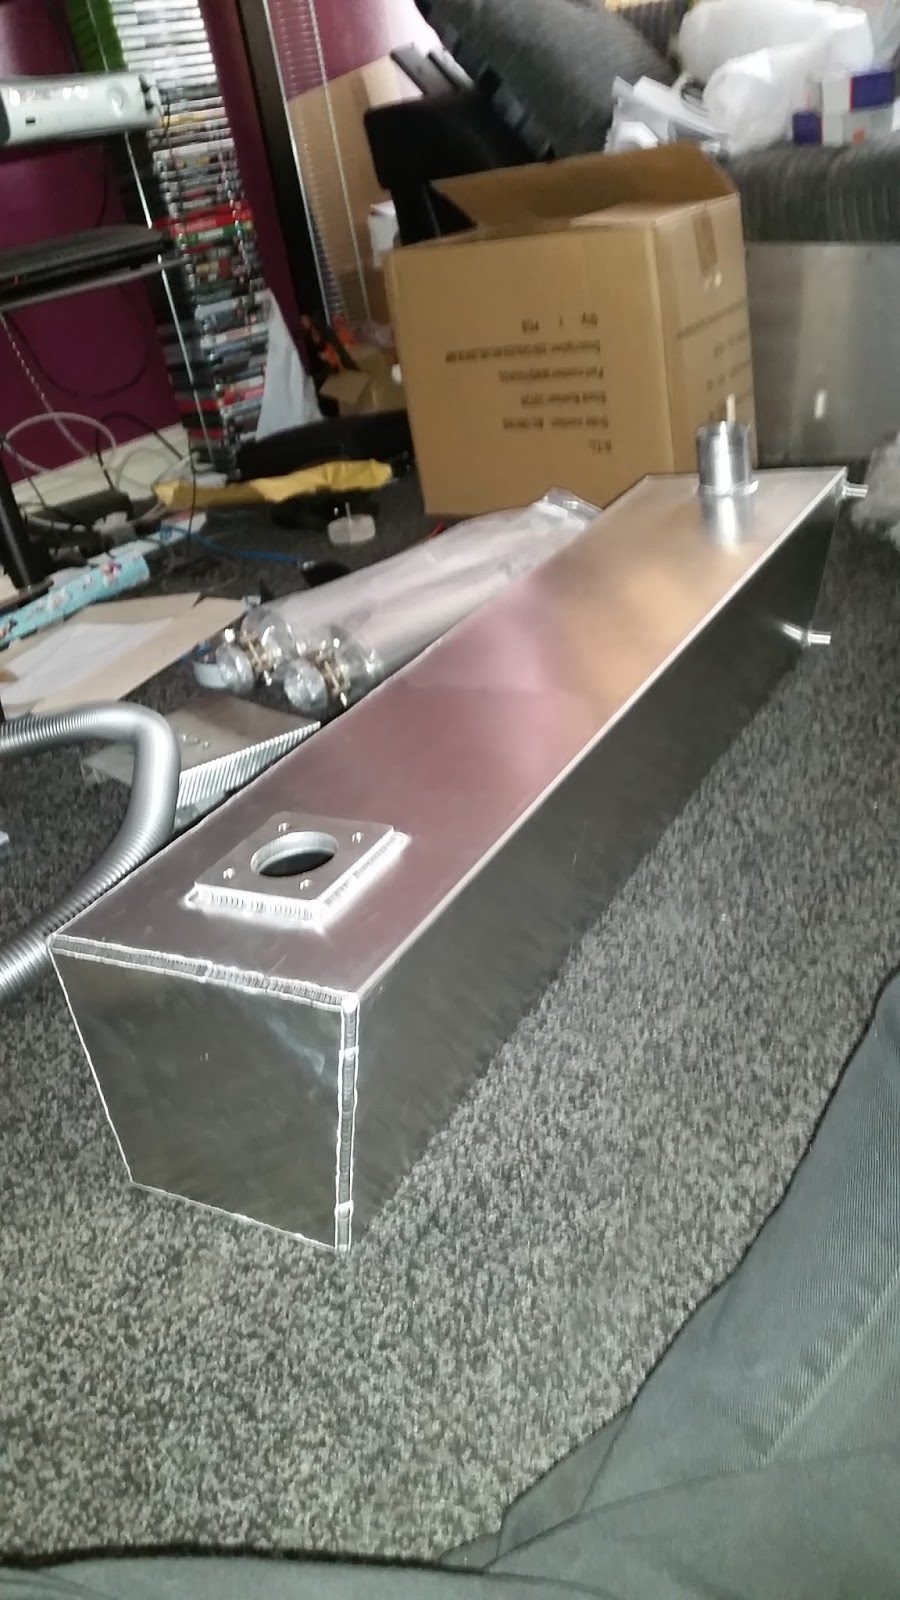
I was caught in two minds how to proceed with this. Did I purchase a new tank from GBS and try again? I felt the numerous "repairs" had in fact damaged it beyond repair and maybe my new found confidence and abilities since the first build had increased, I could suitably solve the problem. My second option was a brand new tank from elsewhere. I contacted GBS and enquired about possibly changing the sender mounting boss as my new digidash wouldn't read the original MX5 sender without a £40 "corrector" for the resistance. Unfortunately GBS were more than happy to manufacture me a new boss and began running off numbers of £200+.....just to get the square mounting boss onto a machine before it had even started cutting. Who was I kidding? Should have guessed they'd claim all these added costs for changing a circular flat boss to a square boss. Hardly £200 worth of work. My opinion was material, waterjet and tapping could still give you change from £20. Anyway, I found JAF Fabrications. I gave him my rough drawing and dimensions (not quite a square tank but not as many angles as the GBS version) and within 2 weeks the fuel tank had arrived! My design, mounting boss for my needs, very quick turnaround and delivery, plus internal baffling (something GBS didn't have) and still had change from that original £200!


Overall, very happy with the tank and once made up, no leaks! Into the car it goes! Time to run some fuel lines...........


So did the push work?

Well...unfortunately not. All this effort was in a mad dash to try get the car running to drive some probably illegal skeleton mess to Stoneleigh Kit Car Show. Using the original donor set up and wiring, with some help we got the car cranking....then coughing....but unfortunately it would not run. We think it came down to a faulty crank sensor in the end however a new one ordered.....but still no luck. Something was still preventing it from running. Looks like Stoneleigh will have to be made in the tintop. Best go order that new loom and microsquirt.....back to Plan F.
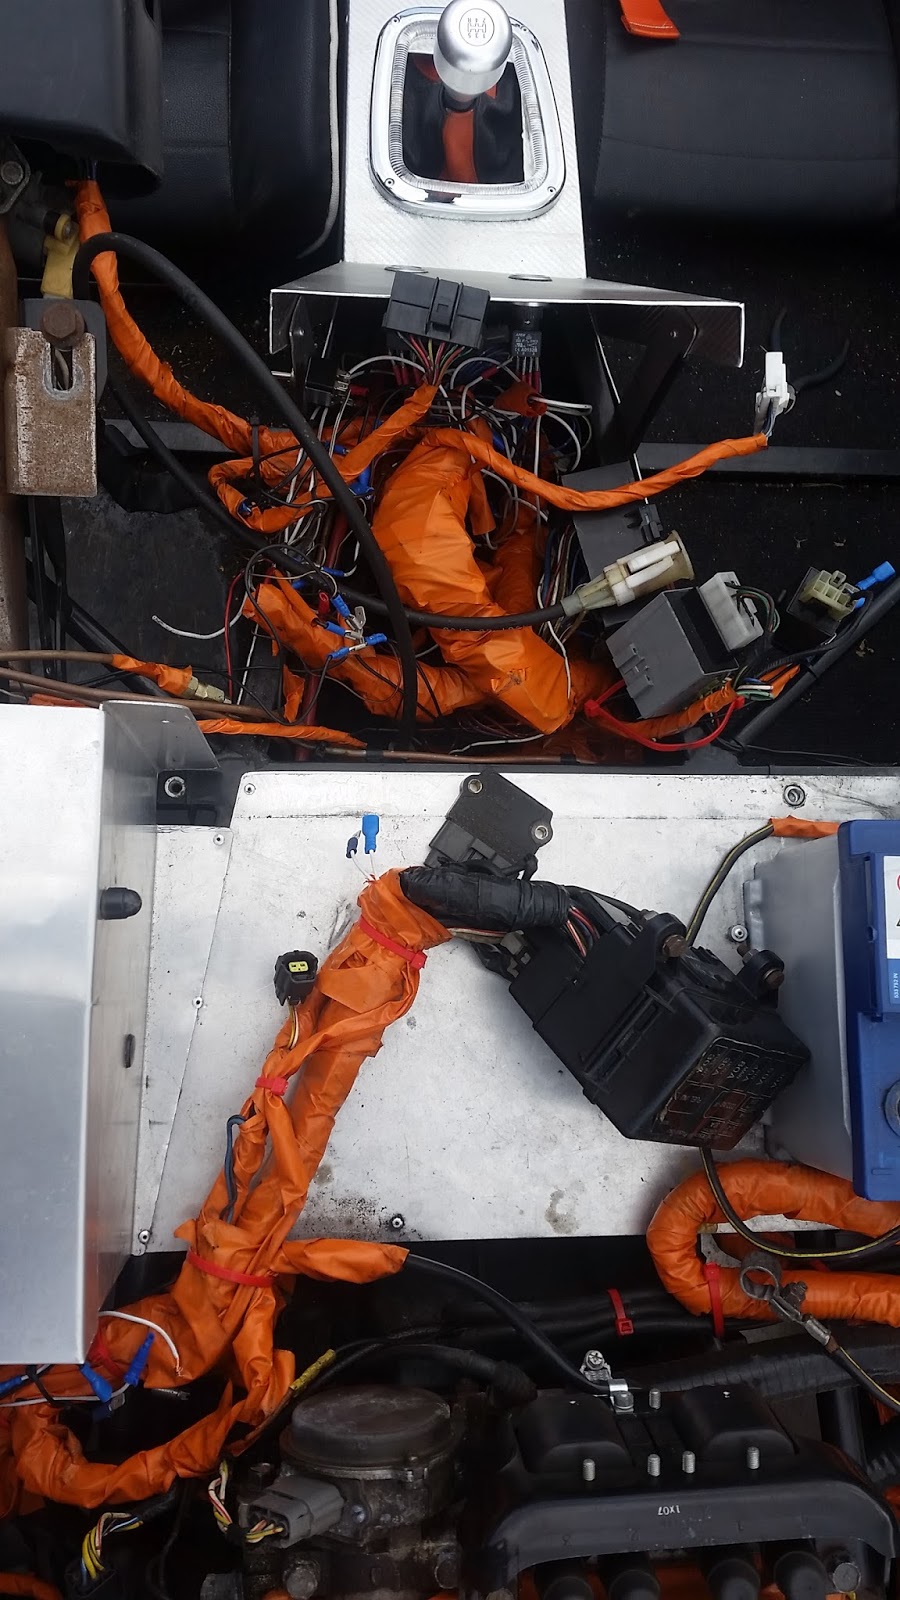

Saturday 12 March 2016

So...does the V6 fit?

Have you ever run head first into something without proper research or planning? I have, that's how this whole rollercoaster began! Once finished I vowed to make sure any future project was properly thought through, researched and calculated. That would have probably led me to rewire the Zero, whack on a supercharger and fit a new fuel tank. That would have solved all my issues with the car since building. Power, wiring and leaking fuel. Easy right?

Well obviously the point has passed that I can return to that safe little plan and well trodden path. Engine sold, V6 purchased, adapter plates made, chassis cut. The perfect recipe for the point of no return. The only thing stopping me now is the engine not fitting......best go make sure....considering I never measured either engine or car and based all research on seeing one in an MK Indy and also a number of MX5s, I kinda just rolled with it, "Yeah it'll fit....I hope".


So, time to tick a few things off; Chassis ready to accept the engine, check. Engine and gearbox mated, check. Wondering if now its together if it'll actually fit, check. Tiny bit of suspense created for the blog, check?  So..place your bets!


So far so good....maybe...........................?


Bah! Absolutely does it fit! And looks very at home. It may not have engine mounts yet but its on the list. The main objective was to check it would fit and currently it does.


Mounted in place only by the single gearbox mount, the positioning in the car appears to work well. The rear of the engine is only 12mm (adapter plate thickness) further forward than the 1.6 sat, however the front is a fair distance back into the chassis so should provide a greater weight distribution to the vehicle.


It's looking tight but it fits. That's the main thing. I can now happily resume with the build and begin sorting the engine mounts. The idea was to ideally re-use the ones for the MX5 engine, unfortunately this was not as straightforward as hoped. So they were chopped up, a new plate welded on and existing chassis mounts could be used. Easier than welding in new chassis pick ups! Thankfully the V6 had spare holes in the block to locate off. A nervous tapping session meant these could be used.


As previously mentioned, my planning is pretty much ad-hoc. Ok so the engine will fit and mounts can be knocked up pretty easily. Where do I go next? Well, obviously sorting some brakes and fuel would be helpful. Electrics are still a mystery to me. I'm planning to make my own loom....I just have no idea where to start or what to do. Maybe I'll get those new brake lines in properly, electrics can wait for now...

Saturday 5 March 2016

Adaptor Plates....Attempt No. 1

The monumental problem with the MX6 is that for some reason, Mazda decided their sports coupe would be front wheel drive. This also means that there never was a rear wheel drive gearbox designed to fit it. Nor does it particularly share any design with RWD applications elsewhere. Bit of a problem as I definitely don't want a FWD kit car...

However, nothing is impossible in my garage! Well....that is a lie. There is a lot that is impossible, so off to the garage to design some adapter plates!


My first attempt was to measure and measure and measure then mock something up in CAD, print off and see how accurate it was. If it was good, excellent, waterjet the aluminium, add some machining and jobs a goodun! Well that was the plan. After a few attempts of measuring and printing a paper template, I felt confident enough to try a 3D mock up. Cheap piece of MDF sourced (cheaper to buy than aluminium and easier to cut a prototype with) and my final paper template and off we went. So far so good! I wasn't exactly using precise measurements or tolerances however it came out ok....for the one side. Obviously tapping into wood and hoping to hang a gearbox off the other side wasn't an ideal scenario. However both sets of holes lined up to their respective designated positions. That's good enough for me to take the plunge for the real deal.


My first attempt for the throttle body adapter plates was not so successful. Aluminium is easy to cut and machine he says. Jigsaw with a metal cutting blade plus some time with the drill and filing combination should be a dream. Bit more labour intensive but saving money with my own man hours....right?


I mean, the general profile cut for the gearbox adapter worked out ok, even decided to do ALL the holes myself, why bother getting the waterjet to at least provide a pilot hole? Pleb. Anyway, using Mk1 prototype "woody" as a template I set about marking up the holes and drilling to the correct sizes. I had also found that Forstner drill bits for wood also worked well on Aluminium to provide a counter sunk hole without buying all the expensive machining equipment to do it properly, yay for cost saving. Just ignore all the mess it creates from drilling 11 holes, tapping 5, counter-boring 4 and complete clearance holes on 2. I definitely should not have done it inside.....


Ta daaa! A full set of adapter plates. Gearbox adapter, throttle body adapter and flywheel spacer. The flywheel spacer ensures the clutch mating is still the same with the gearbox as the adapter plate moves it away. So spacer designed and drawings to Red7 Engineering to turn up on the lathe and happy days!


I guess all that's left is to put them on the engine and cross my fingers they all work!


So the plates fit to the engine. Gearbox adapter no problem, just need to calculate, design and manufacture a starter motor mount, due to fit in the triangle space in the bottom left. Throttle adapters required a minor touch up to fit properly but no issues there, angle grinder out and marked off chunk chopped out. Angle grinder fixes everything....mostly.


All paws on deck! Once again I appear to be ignoring the use of my garage. Good reason too being visiting my parents and then being left to dogsit for a day. No problem, I have small things I can do....


......just don't let them come back and find you making a mess!


Whoops.


I ended up finishing them off back home in the end. Some paint on the adapter and modified linkages to accommodate the increased spacing from the T595 to the KL intake. Vauxhall injector rail with the bigger injectors was chopped in half and used as well (surprisingly the spacing fits well!). These are now ready. It feels like a little victory as I have missed a lot of things that have gone wrong or held me back. However I am fully aware that just because they are assembled here, does not mean they will work on the car....time will tell. It was a nice job to do in the warm of the house during the week nights, now to find a spare weekend for the test fitting....

Friday 12 February 2016

Zach's Zero Mk2 - The Beginning...again

Having finally built up the courage to start Project V6, the Zero kinda needs preparing to reassemble the thing. First of all, having tried to save time/money during the original build, I decided the hub carriers should now be cleaned up and painted. Keeping it simple I wire brushed them all and coated with Hammerite Smooth Black. No need to be fancy or splash out on proper powder coating, just something to tidy it up and the smooth paint covers any cleaning imperfections!


Having taken an evening to clean and paint them, I realised how much better they looked and how simple it was. Kicking myself for leaving it so long, would 100% recommend doing it as one of the initial things. As it turned out, I had done this a lot and a variety of objects would look better with a bit of TLC and painting.


The standard cam cover paint job (I've done a few of these now on my various MX5s...)


Even the engine block got a lick of paint! Black would have hidden the oil leaks well, however the car is not subtle so why should the paint job?

For those perfectionists....don't worry, that rusty pulley is coming off!


Having tarted up the old and new components, the next stage is making sure the car is ready to accept the slightly wider V6. I have measured and measured however there is nothing like dropping the engine in to have a look and get a better view of where it's final position could be. It had already been suggested (as expected) that the two diagonal tubes in the engine bay would probably be too narrow to accommodate the wider V6.


 I find this image perfectly sums up the reasoning for the total rebuild during the engine swap. The wiring was bugging me initially and obviously being my first venture into the kit car world, I had learnt and improved my skills as I went. This meant early stages could be done better and other areas improved.

Anyway, ripped out the wiring and in with the angle grinder! The result....a much more spacious engine bay.


Obviously, nothing on this chassis is just for show. Every bar, every rail has a purpose. With taking out these bars, the rigidity of the chassis has been weakened (Motorsport Engineering Degree coming in handy every now and then!). To ensure continued triangulation of the chassis, I essentially reduced the length and welded in some new tighter bars that reached the sides of the engine bay much quicker.


One thing I did notice from the old bar was some very clear clashing from the old engine! I don't know which part of the engine this was but it was enough to remove the powder coating. This adds to the GBS argument of running individual throttle bodies rather than continuing with the old intake manifold from the MX5. Either way, some careful attention into what the issue was and spacing accordingly would probably resolve this.


As some of you may know, this post definitely hasn't been here since February 2016. I have just got slack with updating things as I go with work being very busy and my evenings/weekends are spent on the car rather than typing up. However as of writing I have a lot to catch up on which hopefully now, I will be able to do.....only 8 months late....but forget that, I did my time hitting deadlines at Uni....and this project definitely didn't hit any of my deadlines! Check back soon! Things are about to get interesting....if I keep the posts coming......................................


Friday 15 January 2016

Lets Strip........Some More Cars.

So here we go yet again! I've been itching to go on this next stage for a long time but with a variety of circumstance changes it got delayed....by nearly a year! Along with this blog getting somewhat neglected too, especially with the back dating that's about to occur!
Cracking on then, the first MX6 was selected for sacrifice to the car Gods and a brutal engine removal took place. I use the word brutal as my plans with the engine are simple. New wiring, new exhaust manifolds, new mounts. Wiring cut sawn through leaving plugs and usable lengths of wire, the exhaust seen off by the angry grinder and engine pretty much ripped out with the engine crane.


I have previously seen on various forums, there is a rumour the V6 is the same weight as the 1.8 MX5 engine and some bare weights that suggest it could even be lighter (now that would be impressive) however the increase in potential power (N/A then maybe with Forced Induction) completely outweigh (pun intended) any increase in weight. As you can see here, the 4 cylinder and 6 cylinder engines side by side give a rough representation of what spacing I should be expecting when I finally get it fitted.


I have found that with 4 engine mounts, various cross bracing and bracketry, opting for just 3 mounts in the Zero may be somewhat optimistic! Will have to look into this come trial fitments and engine mount mock ups. Last thing I want is a record engine removal time as it ejects itself from the car! This led to a thorough investigation and having seen some V8 swaps with just 2 mounts as well, I feel a little more at ease with the idea of using two mounts. Needless to say the first few drives and months will be tender and constantly assessed to ensure no sudden failure is likely to occur.

Anyhow, the day had finally come where the Zero would need to be disassembled and prepared for it's transplant. Its had enough time getting to know the engine as they have been sat side by side for a while as a constant "I can't bring myself to do it" mood had settled. I had grown attached to the first MX5 having driven it for 3 months before breaking for the Zero, but this was much, much worse. Unfortunately, or more like, fortunately, my job situation changed again and leaving one job to start a new one I gave myself a week between to actually pull myself together to pull the Zero apart. It was hard taking those first bits off. Well, after the bonnet and nosecone as they'd been on and off more times than I care to remember, but still, the thought of making this car un-driveable for another few months was painstaking. Despite this, once started there was a 'no going back' attitude and this helped me push on. Anyway a picture paints a thousand words, so I'll let my GoPro video do the talking.


At this point with the MX6 stripped and the Zero now stripped back ready, the project is well and truly underway. Excitement is beginning to rise.........