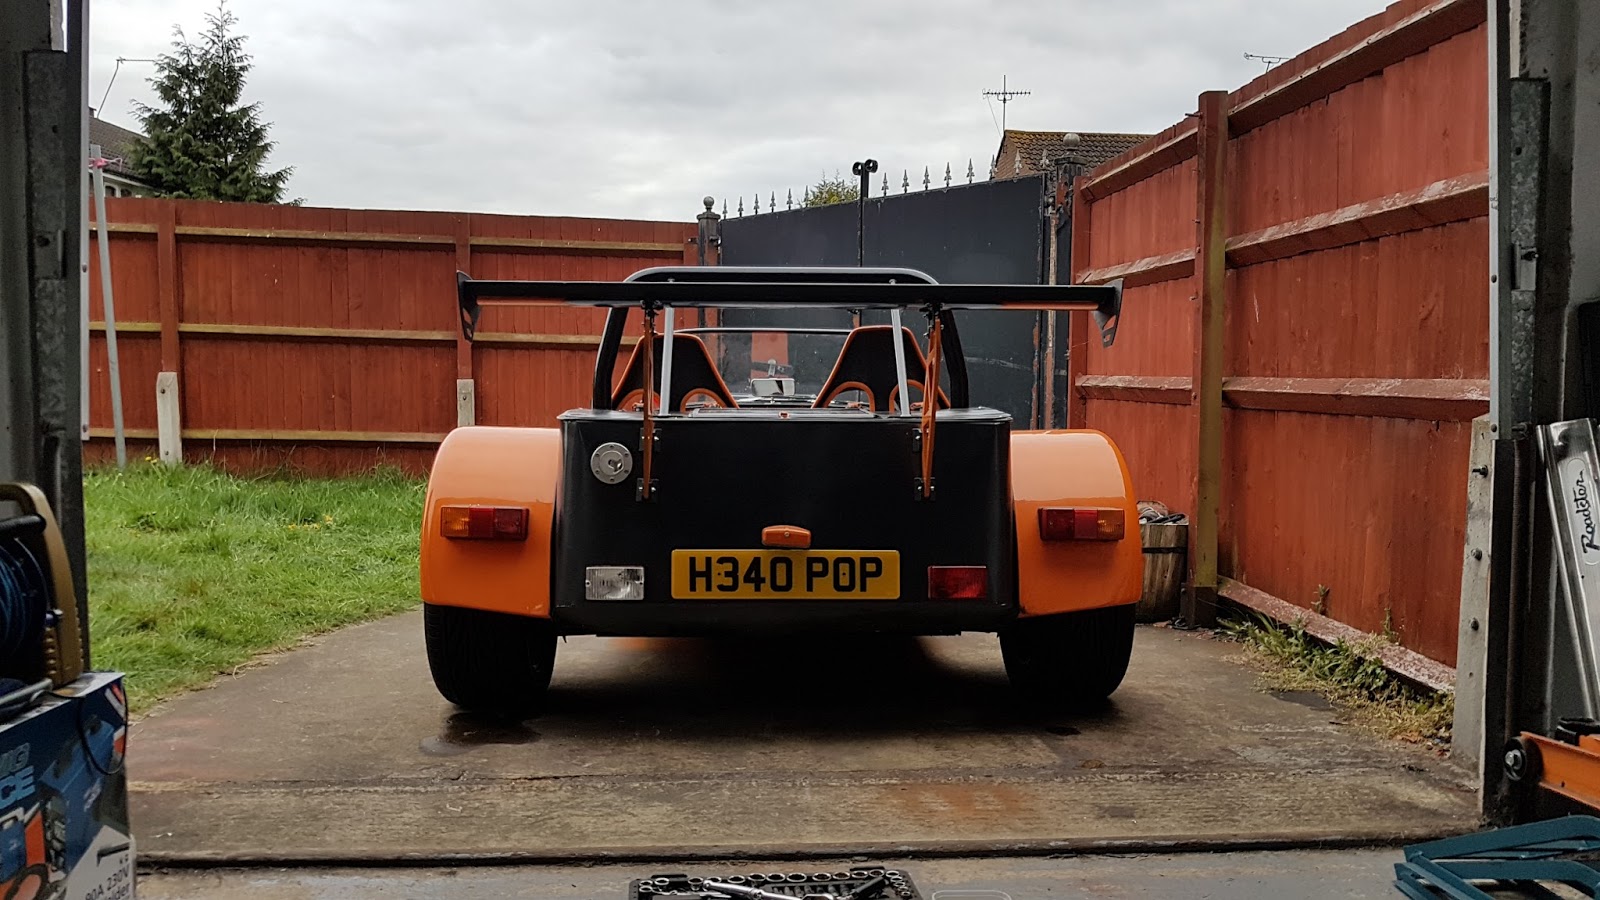
This blog is following the build of my very own Seven Style Kit Car. The kit is from Great British Sportscars (GBS) based in Newark, Nottingham and utilises a Mazda MX5 as the donor vehicle. This is the new Mazda Zero kit.
Now, new targets have been set, Mazda also produced an MX6 with a 2.5 litre V6. The pursuit for more power has begun. 115bhp to just over 200bhp with a hike in torque too....this should be fun!
Having missed last year, I was determined to have the car there this year. A good ol' battle to get the car driving had paid off and with about 5 hours sleep having fixed a major oil leak, I was on my way to meet some of the West Mids Rhocar crew for breakfast.
For some reason any pictures or GoPro footage of this were forgotten, my main aim was to make it for breakfast in one piece. What I can tell you though is the car still drives like crap. It struggles to accelerate, needs to be throttled on gentle and can't seem to do more than 40/50mph....I couldn't tell to be honest, my digidash calculations were way off so my speedo was reading 150mph+ for most the journey. Anyway, despite being a steady drive up there, it was thrilling to be back behind the wheel of the Zero and even more so when I rocked up after 13 miles without issue!
A good hearty fry up and off we went to make our way to the show....but wait, the Zero wouldn't start. The battery was flat! Good job I had a booster pack. Jump start and off we went.....or so I thought.
Well....I'd got about a further 8 miles. Battery was dead again and my booster pack appears to be good for a single jump. Hmm not ideal.
Luckily a friendly Ferrari Replica owner pulled up and let me borrow his spare electric boot lid battery. This gave me enough charge with the booster pack to get the car going again.
The theory was, the alternator wasn't spinning fast enough at idle to keep the battery charging. So another 2.5 miles latter and we were stopped again. Revs dropped and died, no power to restart.
Big thanks to Richy and Jackie for sticking with me, calling Gaz for help as he luckily had a tow rope. Maybe I should figure out a proper towing point....
Eitherway, I was still getting the kit to the show!
In true Rhocar fashion, the moment my car hit the stand, it was set upon. Bonnet was off, alternator wasn't charging, identified the reason, and fixed. Turns out I'd wired two wires into the back of the alternator wrong and as such, the alternator wouldn't charge. Success. It was charging! And then the dreaded....."Is that running on all 6?"
Erm...well....new exhaust system, not properly tuned, never heard it running on all six vs not all six cylinders. I had just assumed this was how it sounded! 3 HT leads later and it becomes apparent we have some fan-dangle cylinder deactivation - for fuel saving of course - problem is, its permanent. Most the day was spent head scratching. New plugs, swapping HT leads. Even the coil pack. Still seemed to make no difference. On the positive, it makes sense why the car was such a bag of crap to drive! With that I left it for the day and enjoyed the 1st day of the show. At least the sun was shining!
We'd came down to 2 scenarios. 1, the firing order was not right, or 2, the throttle bodies are so out of balance the engine isn't firing. In the end, the 2nd day was written off as the car stopped being able to move under its own power, any touch of the throttle would kill the revs and stall. As such, it remained in the camping area......until the rescue team arrived.
After much deliberation, it was decided the best thing to do would be to utilise my AA membership to ensure I got home. The roads around Stoneleigh can be quite bendy with little to no space to get out the way, especially if those with working cars decided for a spirited drive home.....
So that was my Stoneleigh. Arrived with 2 problems, left with 1. Success if I don't say so myself!
Yeah ok, so this is 4 months late. But I'm gonna date it for May so no one really knows.....you're just slacking on reading this post ;)
One of the main issues I've had with this rebuild is my deteriorating health. I was diagnosed in 2003/4ish with Ulcerative Colitis, a part of Inflammatory Bowel Disease (IBD). In simple terms, it is my immune system attacking my own body, seeing it as a foreign body that needs removing. Having been stable for a good 12+ years, it started going downhill as medication stopped working and more powerful stuff didn't touch it either. By Christmas 2016 it was apparent I would be looking at the final option of surgery to remove my colon. Pretty major. So that kind of put me out of action from late March with a week in hospital post-op and 8 weeks off work. Worst part was being told no heavy lifting and taking it steady! That's garage time ruled out then apparently!
If you're interested in learning more about IBD, then this website is perfect Crohns & Colitis UK
However, you're definitely here for the kit build....so back to that we go! At this point in writing, it has become apparent that I have missed some major events of my build.......
So we had the first start. Obviously this was some time ago and the car was built up a lot after this...I'll add another couple videos below, the high pitched squeak you can here was thought to be many different things from a stuck valve or bearings to unbalanced throttle bodies and air leaks. Luckily, it was only an air leak from the adapter plate and throttle body set up. A layer of RTV sealant (same stuff used for the sump) fixed that, the gasket paper just wasn't up to scratch.
So, the car is basically there and ready to go right?
Well....almost.
Knowing I would soon be out of action for a number of weeks I pushed to have the car ready so I could literally sit with a laptop and play with the tune to get it idling nicely and all "heavy lifting" was completed. Not quite what happened, although heavy lifting and contortionist positions were not necessary anymore. The only thing I had left was the wing to do which you saw in the previous post, so not vital but there is a show coming, gotta show off, right? This was done with my willing Brother (probably under the instruction of our Mum to prevent me from damaging myself) who decided he would play fireman instead....
Not entirely sure what he thought would happen but with the wing sorted, I focused on trying to balance the throttle bodies. This was proving difficult....
The theory behind balancing the throttle bodies is simple. You want each cylinder getting the same amount of air, opening and closing at the same time. Usually, the intake manifold covers all cylinders with a chamber and a single butterfly valve at the front meaning all the cylinders get fed from the same capacity of air. With throttle bodies, you have a valve per cylinder....balancing 3 was difficult, balancing that with the other 3 was damn near impossible! - Remember this little nugget. It will become apparent later on ;)
With what felt like an eternity rebuilding again and again the throttle bodies, tweaking bits to aid balancing, I finally got to the stage of having a high idle, plus careful use of the accelerator meant it was enough to drive and at least got me moving under my own power. Sadly no evidence of this other than various rev and idle videos but it was driving! Now to figure out the tuning side to make the fuel map safe.....
But wait!
In true Project V6 fashion, all is not well!
What a lovely breadcrumb path it left to help me find my way home.
At this stage, I am fairly sure the car is very rich. There was the suggestion it was just unburnt fuel/vapours from the engine that were washing down the exhaust and leaking through pin holes and clamping points.
Unfortunately the patches look very much like fresh oil so will definitely need identifying properly. Unfortunately I cannot see where this is coming from....
Deadline to Stoneleigh - Approx 3 weeks.
To add more issues, the alternator I have doesn't seem to be too happy charging nor keeping its belt on. A mix of misalignment and a slack belt I used this ingenious method to put tension on the alternator to ensure the belt was not slack. It aint pretty but it sorted the tension.
Deadline to Stoneleigh - Approx 2 weeks
Well it was running, it was rough, but running. Therefore the truly get going I need to road test and tune the car with the help of tuning expert Dan from RHOCAR. We had planned to get the car going in the morning and tune as we drove to the MOT centre. Unfortunately I still had worsening oil leak issues as well as a real problem with throttle body balancing. Something just didn't seem to be happy. Dan, whilst knowing how to use an alternative ECU, was learning how the Microsquirt and Tunerstudio worked. Despite this, he was able to show I was a lot further back than I thought and whilst we spent the day sorting the idle and basic timing, we had missed the MOT slot.
Overall though by the end of the day the car was in a position drive. It idled happier, it would rev smoother, it would even make it round the block if caressed. The main thing to sort was the fuel VE tables. The problem was finding time and expertise to tune them without using the much discussed Autotune feature which would basically tune as I drove. This has great reviews from hobby tuners saying its improved their car, however rolling road experts highlight the dangers of using it. Great if its a well tuned map 99% complete....using to create a map, no so much. All I wanted was to drive to Stoneleigh and then to a rolling road....but I had bigger issues yet to find.......
Deadline to Stoneleigh.... 24 hours to go.
To help combat my oil loss issues, I rigged up this brilliant contraption. Whenever the engine began to seize, the car would lurch forward, carrying oil out of the bottle and straight into the engine, preventing it from seizing. Braking would also have the same effect and aid preventing getting to the aforementioned situation.
Disclaimer: I did not actually intend to do this...purely a comedic intent to aid laughter rather than crying. Do not try this at home.
Anyway, I battled on and made my way to the MOT centre. Everything I could cross, was crossed.
Problems:
Oil leak
Tracking on the front causing monumental tyre squeal
Poor state of tune meaning its a bag of nails to drive
New brakes are bedding in
Handbrake needs a lot of adjustment
Air leaks, throttle usage and tune combination causing mega lean spikes in AFR
Plus 1 more issue found later in time...probably accounting for 2 of these issues
However this little trooper made it and the test centre....then disaster! I'd misbooked my appointment for the Friday rather than the Saturday (muppet), already got 2 walk ins and low staff. Thankfully, having explained my situation - plus a bit of begging and pleading - they reckoned they could squeeze me in. It was make or break for the kit standing any chance of getting to Stoneleigh.
A quick top up of oil and we were off. I won't bore you with the details but the MOT Gods were kind. Despite the battery giving up - still no/not enough charge from the alternator (surprisingly, its not a fail!) - this happened:
Yes I framed the MOT pass certificate and hung it on the wall. And what?!
A few more advisories than some would like but its my car, it'll have many more before ever looking at being sold so I didn't care, the pass was enough!
It did however leave me with a number of things to sort out, most importantly, I had discovered the source of the oil leak.
The oil filter/cooler housing. Here you can see just next to the alternator.
Due to the new environment, I have had to fit a relocation kit. Annoyingly, this still fouls the engine mount and during use, the engine is knocking the housing which is pulling the lower edge away - hence a worsening leak...
Deadline to Stoneleigh - Saturday, 18 hours to go
I would not give up. I still had the afternoon to try sort this. My good friend Stu was following progress. His car was in a better state from last year and at least in a driving condition. With the amount of oil I was losing though, I definitely would not be making it. In a bid to help he popped over and offered an extra pair of hands to get the car going, maybe even have a play with the tune to make it less of a pig to drive.
First thing first, sort that leak. Being an aluminium block, threads are easily stripped. To prevent this (and also maaaaybe having already done one) I helicoiled the threads to help when pulling the cooler tight.
Unfortunately, with this going on and off numerous times, we quickly found oil going everywhere. It just would not seal. We tried to move the engine mount, we grinded some of the contacting edges, however the engine just kept knocking it loose and the gasket paper was not able to fill the gap effectively. We'd even run out of curing time for the RTV sealant so if Stoneleigh was to happen, we had to be sure it'd fix it and try speed up curing time overnight. Unfortunately we couldn't get close. It was getting worse and pouring out.
But then....brainwave. In a car that has more spacers and adaptors than...well any bodge job before, it hit us. What if we spaced it away from engine. Would this give the clearance to the mount? one way to find out!
Yes it is simple. Left over aluminium plate, 3 clearance holes and 2 holes for the oil. Yes it probably restricts flow, but its the best we could provide at midnight with limited fabrication skills/equipment.
Yes you heard, midnight. It was technically Sunday and the day of Stoneleigh. In 8 hours we would be meeting for breakfast before convoying to the show. It was last chance saloon....
There is no easy way to put this though so here it is..............
IT WORKED!
We had managed to provide enough clearance to tighten the cooler on enough to compress both gaskets either side of the spacer plate! No more oil leak! Double check we actually had oil in...yep still no leak! Winner. Car was now back together and called it a night at 1am.
Deadline to Stoneleigh Departure - 6 hours
Right, clean up, pack tools, pack overnight bag for camping, sleep....
Right well as I'm so far behind, this may miss a majority of the specifics...but here it goes anyway.
We left the previous update with the a lot of the car coming together separately. Since then, it has literally been a case of bolting things on and reassembling ready to get to the point of starting the car to then tune and drive it. We had a bit of a pic drop where the car was clearly at various stages as things were completed at whatever I felt like doing at the time (yes we went a bit headless chicken sorting various things out then getting distracted by something else).
Scuttle and pedal box
This bit is easy, it literally assembled back and dropped on the car. This had been done several times as I chased wires and played with the dash etc etc. The detectives out there will have noticed I slipped a picture in my last post with it all fitted, but here it is:
So not exactly mind blowing change here, just a lick of paint.
The real change is on the other side.........
New DigiDash/Dash Panel
This is probably my favourite part of the car. Mainly because it actually looks right and decent. I purchased a new Digidash back when the Mx5 speedo cable kept braking but it never really worked....but that was because I never go round to sorting the speedo out as I was consistently "going to rebuild soon"...for best part of 9 months. Anyway, a couple more bits added - wash/wipe buttons - again something that got neglected forever - but now work! And a lower switch panel overhaul.
The reason this probably worked is because I planned it. See sketches and test material? Winner. Wish I did this for everything!
With the lower dash panel fitted, it was looking good....but here is where the real magic happens. Illumination. My favourite close up shot of the car going
You can also see the new 12v socket and USB socket too. Because eBay.
Seats
I should probably actually fit these now, they are kinda useful and much comfier than the floor. However, we have a major issue straight away. This photo below is at eye level with the seat on the adjustable runners....
Don't know about you but I kinda like looking over my steering wheel and not through it. Became apparent that my old seat base had lots of framework and padding, this GRP/Carbon seat basically sits on the floor! Off I go to buy some 50mm box section to raise me up.
Much better, looks like a perfect excuse for a new smaller steering wheel now, wink wink. Currently rocking a 13inch wheel off the MX5 donor I first used. 11-12inch should see me right.
Bonnet Part 2
We left the last post with the bonnet not fitting. Uh oh. Sadly, as cool as it looks without one, I think a bonnet might be a legal requirement.....so time to get inventive.
I decided the best look could come from an induction cowl style hood. Obviously money is tight and with the view of one day getting it done properly, ghetto mods are required.
Enter this monstrosity! In a bit to give my filters clearance, I had to raise the centre approx 150mm with approx 100mm of bonnet left to try keep some rigidity possible without bracing it to death.
So, plan 2. Ramair style. It aint pretty but it fits. The mesh helps finish it off and bracing straps keep it from flapping about when I take it off.
I'll be honest....its growing on me.
Again, using photos out of order, some people might see a new/improved addition.....
New Rear Wing
Ok, so strictly speaking, its not new. Same wing. The mounts and location though, they are.
Using my CAD (Cardboard Aided Design) skills, I mocked up some approximate test mounts to gauge an idea of height and fitment. Which transformed from cardboard to MDF.
Well, it raised it up substantially!
A little too high for my liking, despite probably being more functional there. However the aero on this beast is worse than a brick so as before, its the aesthetics I'm aiming for.
Off I go to use my proper CAD skills to get a model to have watercut as my scissors weren't gonna cut it (pun shamelessly intended) when it came to the final aluminium design.
With a little bit of bracing in the rear panel, it was fitted. Aaaaaand with the customary colour scheme.
So there you have it. I'd say thats looking pretty much there now, right?
WRONG.
I still have mapping to do and get the engine running properly. Now we can get onto the fun and juicy stuff!
Well, I'll start this off by holding my hands up and saying I've been incredibly slack with firstly, doing the kit which explains secondly about updating the blog. As I think I've mentioned before, everything seems to be against the project with delays both with it and outside it with life (wow I miss being a student with all that free time!). Anyway, I shall throw this together as a nice little catch up of where I am at.
It also marks approximately the 2 year anniversary of collecting the Mazda MX6's which have bravely given themselves to the cause and to this day, one still sits happily in my garden!
This also means my planned 5-ish month engine swap/rebuild has tipped over the 1 year mark. Wow. So whilst feeling proud of my achievements 3 years ago, I am a little depressed that the time has flown by and the magical beginners luck appears to have worn off....I'm sure that is short lived though, come see why..............
Wiring Update...again
Right, moving swiftly on, we left off in June 2016 apparently with my new loom from RapidFit beginning to find its new home. The main aim of the rapid fit was to replace the existing MX5 loom that had been stuffed into the car, unmodified and wrapped in orange tape (gotta keep the colour scheme going, right?). As previously mentioned, this resulted in a highly visible chunk of orange electrical tape and scruffy looking finish. I'm just glad I never had any electrical gremlins to trace!
For approx £200 this RapidFit loom eliminated a large chunk of the unnecessary circuits and meant I could realistically look at making the wiring neat and tidy. However that will only happen once everything is working correctly as it should....until then...organised chaos! Taking a while so don't hold your breath!
Throttle Bodies
With the exhausts already sorted from the Stoneleigh push, I reverted back to my original plan of using a pair of Triumph T595 throttle bodies. The reason for selecting these.....well, it's what Claire knew well and worked for her so why change it? Unfortunately Claire was too busy to make me one of her sets so I set about doing it myself.
This helped give me a bit of a break away from the car electrics as it was something I could take with my back to my parents house one weekend.
They left me to dog sit so I thought I'd assemble the throttle bodies whilst they were out. Just don't make a mess......whooops!
Not gonna lie, the help was a bit naff. Had no idea what to do and ended up sleeping on the job!
The finished product reused a fuel rail from a Vauxhaul Omega 3.0 V6. This is what the injectors came from and with new O-rings, the injectors fitted perfectly into the Triumph slots. Just need to add some hose and rail clamps and we're good to go!
And if by magic......
You can also see I opted to reuse the 3 long HT leads from the 2 engines as having 3 correct and 3 sticking out (due to lengths of the leads) just looked silly. At least this was intentional silliness. I've had to do this as going from distributor to EDIS means half the HT leads don't reach and the ones that do used to contend with the intake manifold, hence the height. I kinda like it though....but should probably sort out some new custom leads soon when funds allow.
Despite individual cones being power killers (and reminded of that every single time by at least 1 person whenever a post goes on Facebook) I quite like the look regardless of the few BHP lost. Its a massive step up already so I'm in no rush to unleash the full potential from day 1. It has been a couple years so will want to ease back into this animal!
New Seats!
Another upgrade to the car was my decision to buy new seats. I wanted to try the GRP style seats with past experience of them (albeit brief test in a stationary car) and finding them reasonably comfy - or at least comfier than I was expecting!
My decision was made for me one day when I took a seat on the driveway, in the sun, to admire the car coming together and take a well earned refreshment break. I was planning to refit the old seats however as I placed myself into it and sat back, I just kept going! At first I thought they were very unstable without the backs supported or bolted to the floor! Turns out the frame had snapped and the seat literally went back flat. I'm only 11 stone at best so I don't believe I've abused them enough to cause the failure. Sadly, GBS's default response was the warranty had expired and basically had no interest about potential safety issues or investigating! To me it was pretty simple. The frame was cheap and not up to scratch. Glad I didn't find out in a crash or mid corner! Anyway, importantly, I didn't spill my beer and it unfortunately forced my hand to buy these lovely Carbon Fibre seats, I was clearly devastated by the loss.....
Add the customary colour theme....
And customary trial fit.
Straight away I have a major issue.....I'm sat far too low now and my eye line is level with the top of the steering wheel. Not an ideal driving position if I'm honest! To fix this, I have mounted the seats on some 50mm box section to raise me back up. With the addition of some neoprene foam stuff on the seats (more for insulation than comfort I hear) I have gained the necessary height to feel comfortable seeing over the bonnet and able to drive the car. Looks like I don't need that lowered floor after all now........
So I think that is about a decent place to stop. Its been a whirlwind of a catch up with many things going on all over the place and trying to find the time to write up this stuff. Don't worry fans, I'm still here and still determined to get this finished......one day....
I think I have previously mentioned that the electrics was a major player in the decision to embark on this rebuild. For those who did not see the original car or cannot recall the pictures I have shown here, I'll fill you in quickly.
My original wiring was an abomination!!!!
Yep. Filled in. My problem was not having much knowledge or care for electrics. Plus deciding to save money in the build I reused the original MX5 wiring to aid getting the car up and running.
Problem 1. There was a lot of wiring not actually required from the MX5 that remained in the loom = Excess weight.
Problem 2. There was large sections of wires not covered with anything to protect or tidy them up = Potential short and a bit rubbish.
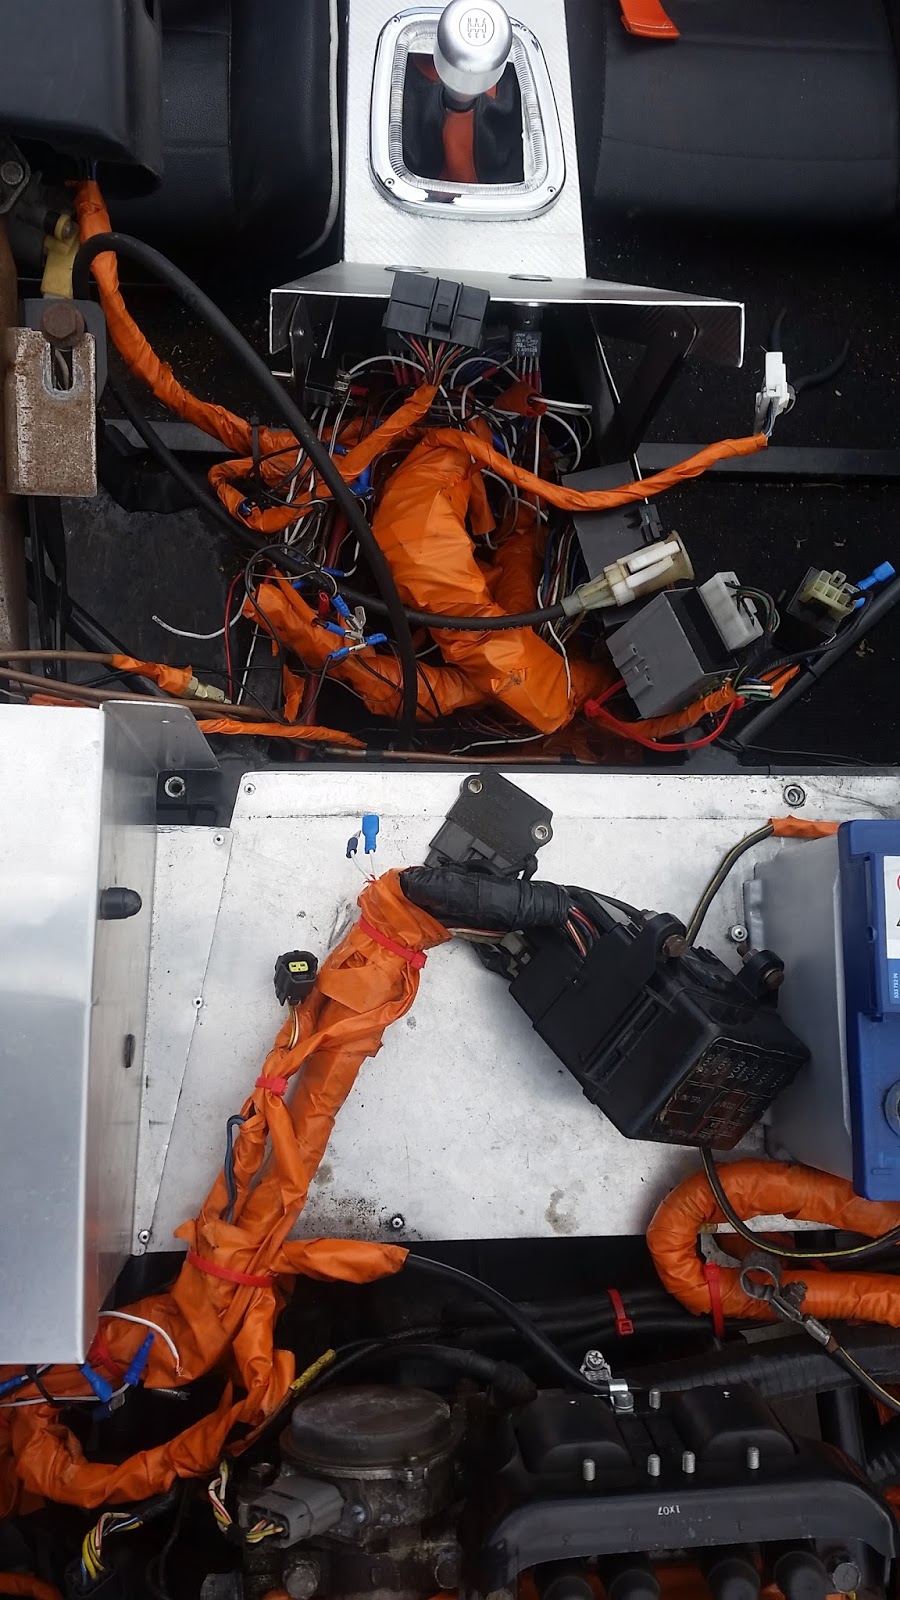
Problem 3. To solve Problem 2, I just wrapped everything in orange electrical tape (colour coordinated you see!) including cable tied chunks of Problem 1 which also got wrapped into an orange clump of ugly = Rather aesthetically shocking - pun intended.
Look at that beautiful wiring tape!
Strangely, I never had any electrical issues, so why take out something that works? Well I got to the stage of trying to avoid taking the bonnet off due to the unsightly mess that the wiring was. Unfortunately, car enthusiasts, being the strange animals we are, always wanted the bonnet off to check out the heart of the machine in front of them. Queue awkward "ignore the wiring" comments....
Under the dashboard/scuttle was no better!
With the old engine removed, you can see the extent of wiring remains. I am truly pleased to be getting rid!
Initially the plan was to build my own loom, cutting the size down immensely. However I had neither the knowledge, patience, time nor desire to do truly this...or learn to do this for that matter. Quick look to RapidFit Looms and their standard 7 style loom was a price worth saving the effort of my own loom. Hand in hand with a standalone Microsquirt ECU to control the engine on its new throttle bodies, Jez (RHOCAR) came and helped me throw away the MX6 loom and set me on my way with the new stuff!
Yes the wheel is upside down.......still building!
It is already so much better looking than my original loom, ok it's spread out but there is less to spread out! It also is pretty straightforward to plug and play with virtually everything between Rapidfit, car and Microsquirt after a bit of thought. So credit where credit is due to RapidFit, MicroSquirt and Jez! Once everything is working I will begin making it neat and tidy. No more ghastly orange tape bulk wrapping!
Don't hold your breathe though, this may take a while!